


How to Register MuConvert YouTube Music Converter
MuConvert YouTube Music Converter has free trial and registered versions and you can choose either one according to your needs. The free trial lasts 14 days and can only convert the first 3 minutes of each song. With the registered version, you can download all content from YouTube Music, and features like batch downloading, 35X faster speed, and parameter adjusting will all be available. Here are the detailed steps on how to activate.
Step 1. Install MuConvert YouTube Music Converter
Click the buttons below to download and install the software on your computer.
Step 2. Get the Register License
Head to the MuConvert Online Store to select a registered plan from 1-month, 1-year, and lifetime. When the payment is completed successfully, you can receive a confirmation email with the license code attached (please make sure you have entered the correct email address when inputting your information).
Step 3. Activate MuConvert YouTube Music Converter
Launch the app and the registration window will pop up. Simply enter your email address (the one you used for purchasing) and the license code, hit the “Activate” icon, and successfully activate the registered version.
NOTE: If the registration window fails to pop up, access it by hitting the “Unactivated” icon on the top right of the software window.
How to Download YouTube Music to MP3/FLAC/WAV/AIFF/M4A/ALAC/AAC
In addition to converting YouTube Music to MP3, MuConvert YouTube Music Converter also allows you to download singles, playlists, and albums in M4A, FLAC, and WAV formats. With just a quick drag-and-drop or a simple click, the entire process is made effortless. Here’s a step-by-step guide on how to do it.
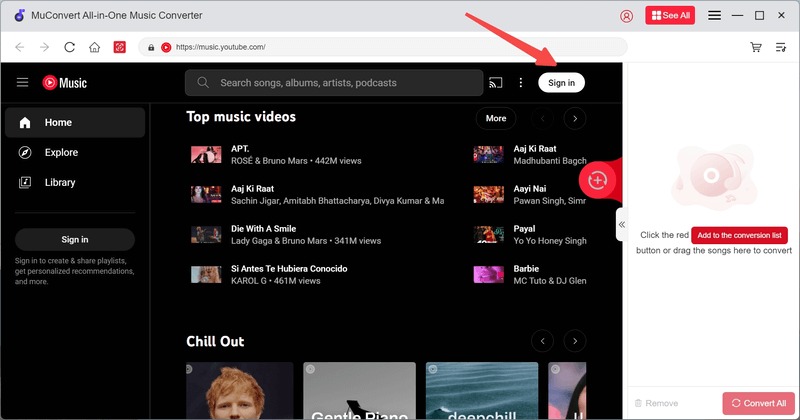
Step 1. Access YouTube Music Web Player in MuConvert
Start by launching MuConvert on your computer. Once the software is open, select the “YouTube” service. This will bring up the YouTube Music web player interface within MuConvert. To access your saved playlists, click the “Sign In” button located in the upper-right corner and log in using your YouTube Music account credentials.
If you prefer not to log in, you can still use MuConvert to convert and download YouTube Music without providing your account information.
NOTE: Whether you are a free or premium YouTube Music user, MuConvert YouTube Music Converter is fully compatible and allows you to effortlessly convert and download YouTube Music to MP3 or other popular formats with just a few clicks.
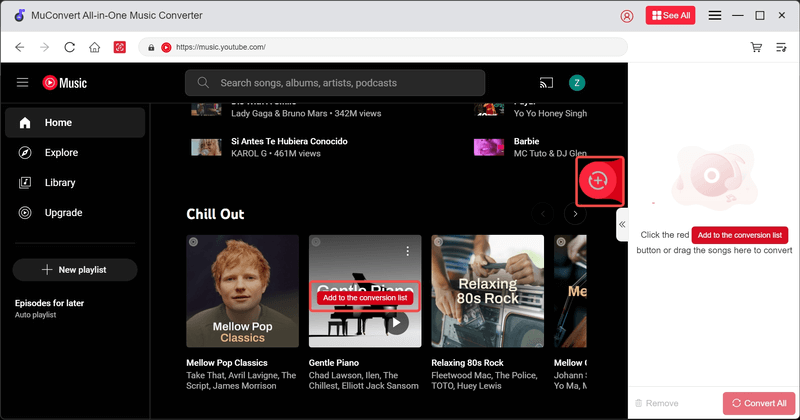
Step 2. Add YouTube Music for Conversion
Within the YouTube Music web player interface, you can browse and select the playlists or songs you wish to convert and download for offline use. To add content to the conversion list, you have two options:
- Open the desired playlist and click the “Add to the conversion list” icon located above the playlist.
- Alternatively, you can drag and drop the entire playlist or individual songs into the conversion list on the right side of the interface.
MuConvert will automatically add all selected songs to the conversion queue. The software also includes a built-in duplicate filter, ensuring that no song is added more than once.
Step 3. Choose Your Preferred Output Format
After adding the songs or playlists you want to download, navigate to the “Audio Quality” section. Click the drop-down menu to select your desired output format. MuConvert supports a wide range of formats, including MP3, FLAC, WAV, AIFF, M4A, ALAC, and AAC.
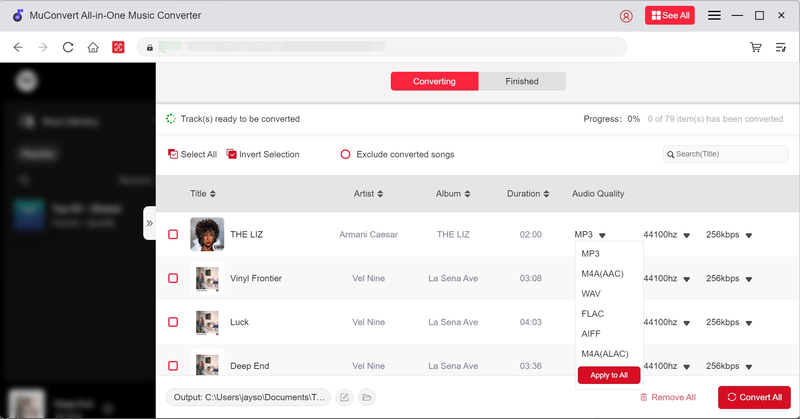
NOTE: MP3 files generally occupy less storage space, while formats like WAV and FLAC tend to have larger file sizes due to their higher audio quality.
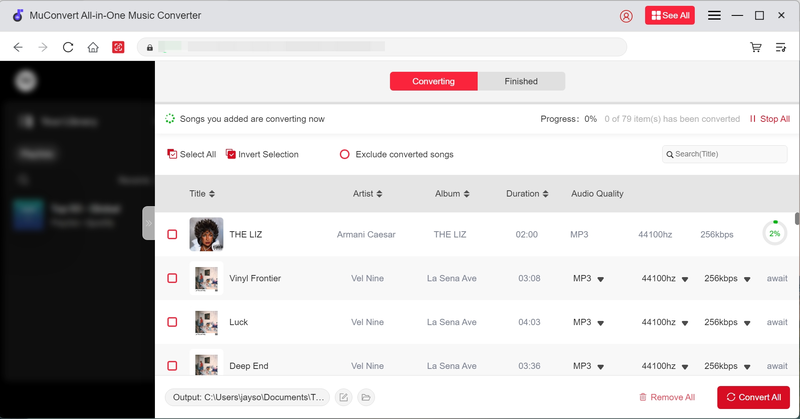
Step 4. Convert Your YouTube Music
Once you’ve configured the settings, click the “Convert All” button in the conversion list. MuConvert will immediately begin processing the conversion and downloading your YouTube Music in the selected format.
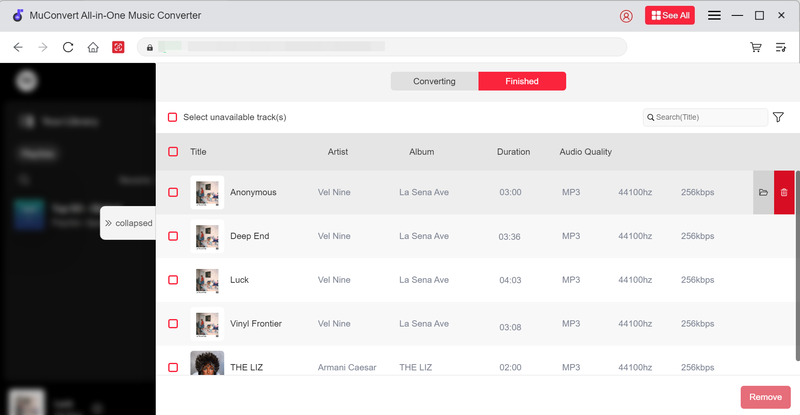
Step 5. Access the Finished YouTube Music
To locate your downloaded files, go to the “Finished” section and click the file icon. This will open the output folder where all your converted music files are stored.
How to Customize Output Settings and Folders
MuConvert YouTube Music Converter provides comprehensive control over audio output quality and file storage locations. You can adjust bitrate, sample rate, and even specify a custom folder for your downloads—all with intuitive ease.
Adjust Output Settings
By default, MuConvert YouTube Music Converter uses a 256kbps bitrate to match YouTube Music’s standard quality. For audiophiles seeking enhanced clarity, the software also supports 320kbps high-quality conversion. Follow these steps to customize settings:
Method 1. From the Conversion List
- After adding songs, expand the conversion list.
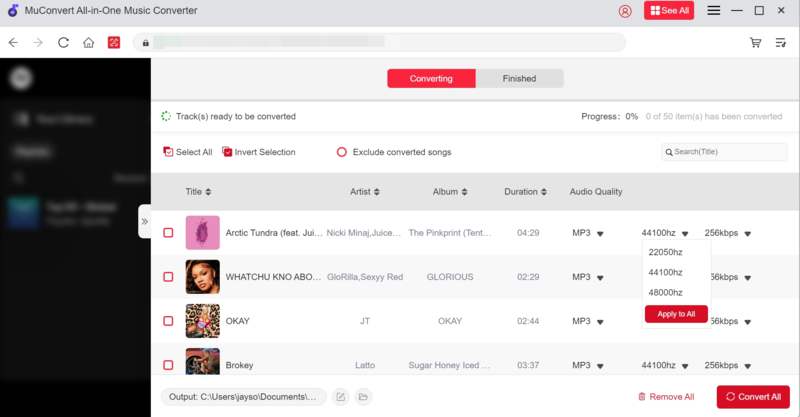
- Locate the Bitrate and Sample Rate dropdown menus.
- Select your preferred values (128kbps, 256kbps, or 320kbps).
- Click Apply to All to finalize adjustments.
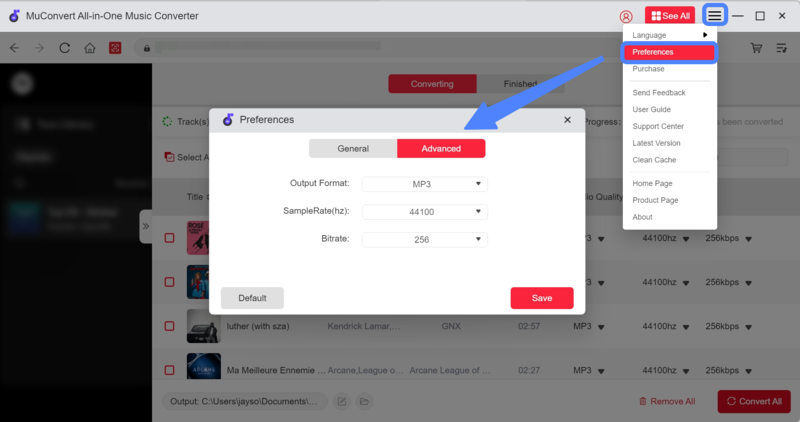
Method 2. Click Preferences
- Click the Menu Icon (☰) in the top-right corner.
- Choose Preferences to open the settings window.
- Under the Audio Quality tab, configure Bitrate and Sample Rate.
Change Output Folder
While downloads are saved to the default installation folder by default, MuConvert YouTube Music Converter lets you choose a custom directory for your files. Here’s how:
Method 1. Directly from the Conversion List
- Expand the conversion list and scroll to the bottom.
- Click the Folder Icon next to the current output path.
- Browse and select your preferred save location.
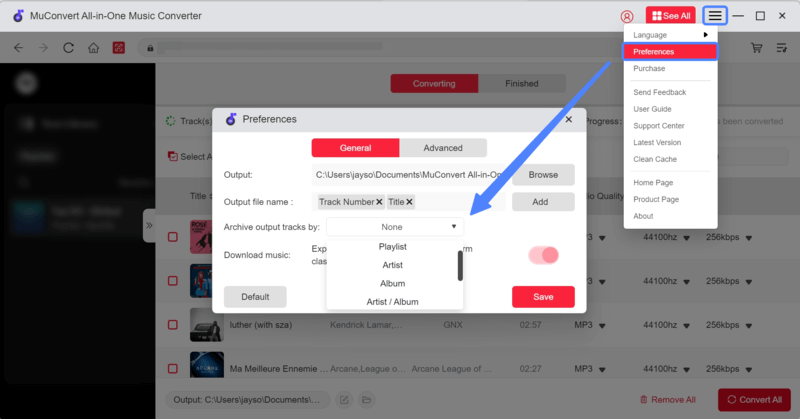
Method 2. Through Preferences
- Go to Menu Icon (☰) > Preferences.
- Under the General section, click Browse next to Output Path.
- Select a new folder and click Save to confirm.
How to Change Language and Manage History in MuConvert
If you need assistance with MuConvert YouTube Music Converter, this guide will help you navigate the interface and manage your download history effectively.
Change Program Language
The interface of MuConvert YouTube Music Converter is integrated with the YouTube Music web player, so its core layout cannot be customized. However, you can easily switch the program’s display language to suit your preferences. Supported languages include English, Japanese, French, German, and Chinese.
To change the language:
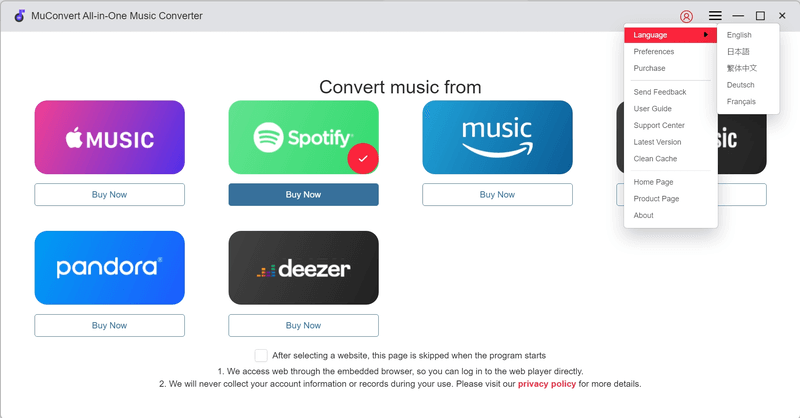
- Click the Menu Icon (☰) in the top-right corner.
- Select Language from the dropdown.
- Choose your preferred language, and it will be applied to the entire program instantly.
Manage Conversion History
While converting YouTube Music, the conversion list page remains open and cannot be minimized to a sidebar. During the process, you can monitor the progress of each song through individual progress bars next to the tracks, as well as a general progress bar at the top of the page. You also have the option to pause or cancel conversions at any time.
Once the conversion is complete, navigate to the Finished section. Here, you’ll find a list of all successfully converted YouTube Music tracks. To quickly access the folder where your files are saved, click the Folder Icon next to each track. If you wish to clear your conversion history, simply click the Trash Icon to remove the records.
NOTE: The Clear Cache option in the Menu Icon (☰) is not used for managing conversion history. It only clears account-related information and cached data.
How to Update/Uninstall MuConvert YouTube Music Converter
MuConvert YouTube Music Converter is designed for ease of use, whether you’re updating to the latest version or uninstalling the software. Below is a quick guide to help you through the process.
Update MuConvert YouTube Music Converter
To ensure the best user experience, MuConvert YouTube Music Converter is regularly updated with new features and improvements. You can update the software using one of the following methods:
Method 1. Auto-Update
The software includes an auto-update feature. When a new version is released, you’ll receive a notification upon launching the program. Simply confirm the update, and MuConvert YouTube Music Converter will automatically upgrade to the latest version.
Method 2. Manual Update Check
If you prefer to check for updates manually:
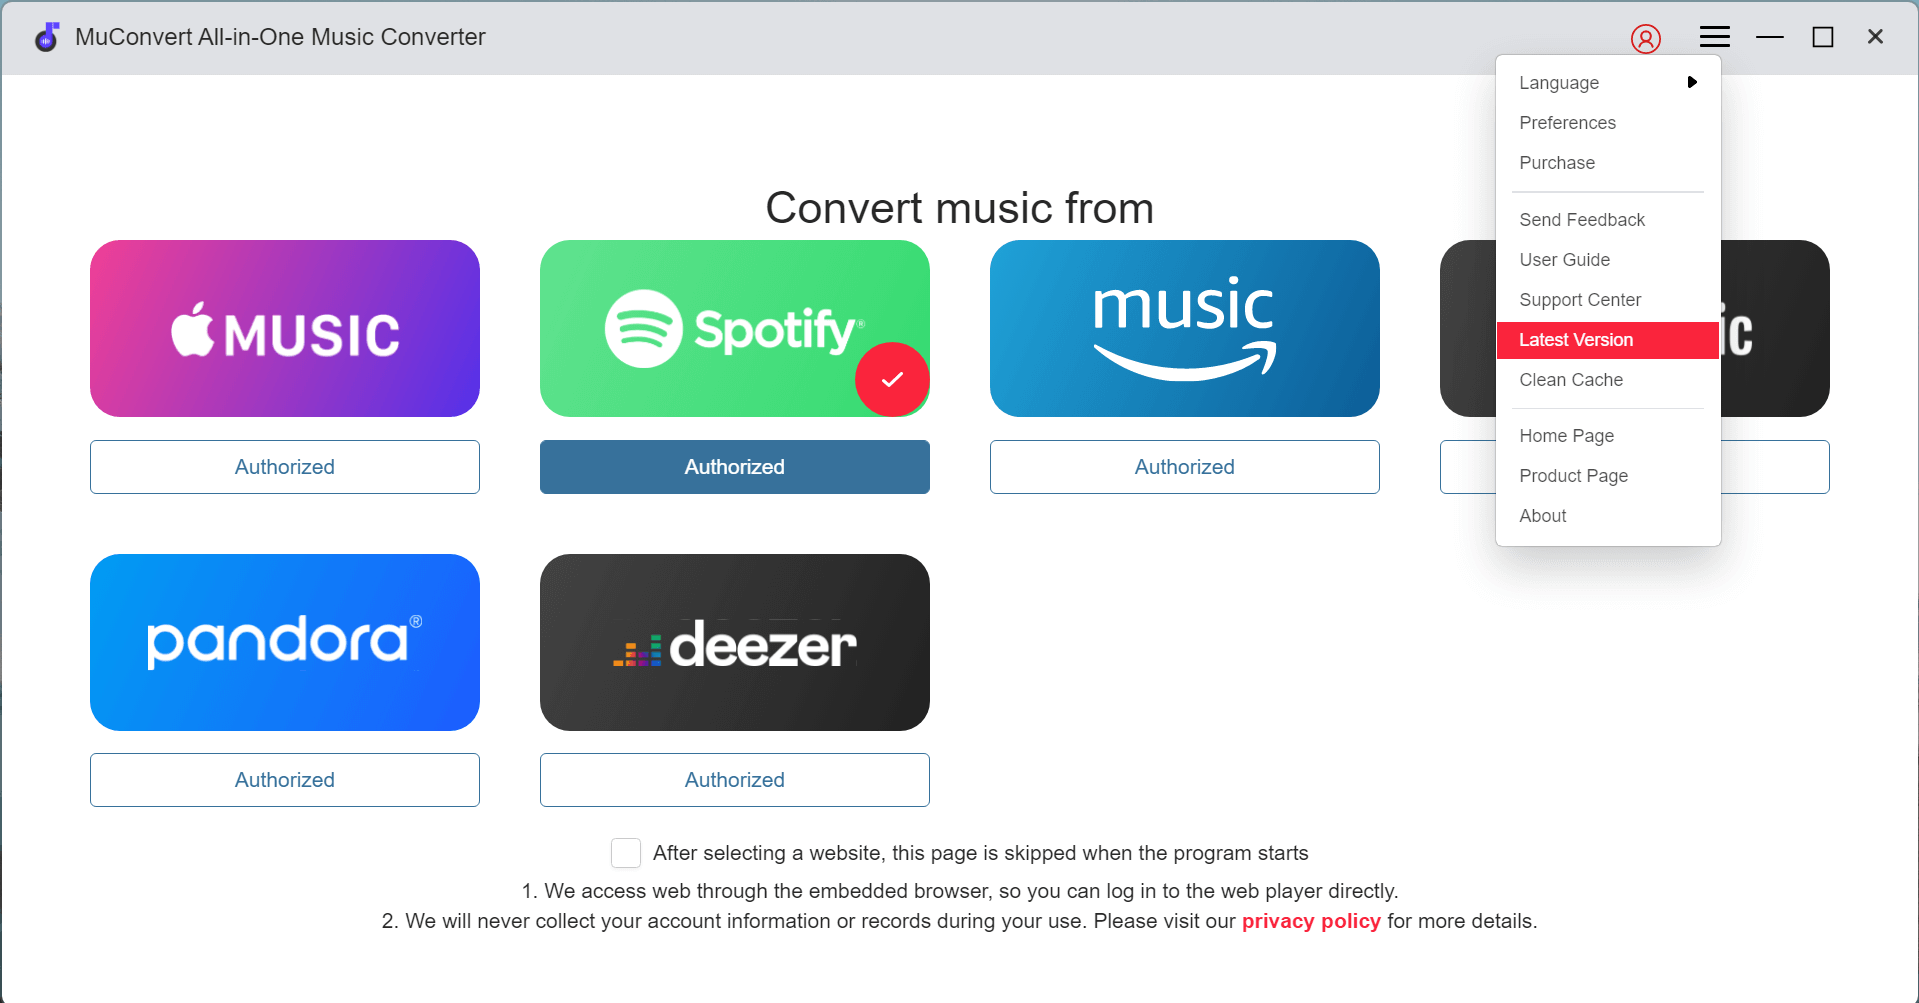
- Click the Menu Icon (☰) in the top-right corner.
- Select Check for Latest Version.
- If a new version is available, follow the prompts to complete the update.
Method 3. Reinstall the Software
You can also download the latest version directly from the MuConvert YouTube Music Converter product page. Simply reinstall the software to ensure you’re using the most up-to-date version.
Uninstall MuConvert YouTube Music Converter
The uninstallation process varies slightly depending on your operating system. Here’s how to remove the software:
For Windows Users:
- Locate the MuConvert YouTube Music Converter icon on your desktop.
- Right-click the icon and select Uninstall.
- Follow the on-screen instructions to complete the removal process.
For macOS Users:
- Open the Launchpad and find the MuConvert YouTube Music Converter icon.
- Press and hold the icon until an “X” appears.
- Click the “X” to uninstall the software.
- How to Download Spotify Music to USB Free for Car Playing
- How to Burn A CD from Spotify [Really Work!]
- How to Make Ringtone from Spotify Song on Phone: Fast & Free
- How to Use Spotify Alarm Clock on iPhone/Android/Smart Speaker
- How to Make Rainmeter Spotify Visualizers Work
- How to Use Spotify with Virtual DJ