


How to Register MuConvert All-in-One Music Converter
MuConvert All-in-One Music Converter provides free trial and registered versions for you to select. The free trial lasts 30 days and can only convert the first 3 minutes of each song. With the registered version, you can download all content from the supported platforms, and features like batch downloading, 35X faster speed, and parameter adjusting will all be available. Here are the detailed steps on how to activate.
Step 1. Install MuConvert All-in-One Music Converter
Click the buttons below to download and install the software on your computer.
Step 2. Get the Register License
Head to the MuConvert Online Store to select a registered plan from 1-month, 1-year, and lifetime. When the payment is completed successfully, you can receive a confirmation email with the license code attached (please make sure you have entered the correct email address when inputting your information).
Step 3. Activate MuConvert All-in-One Music Converter
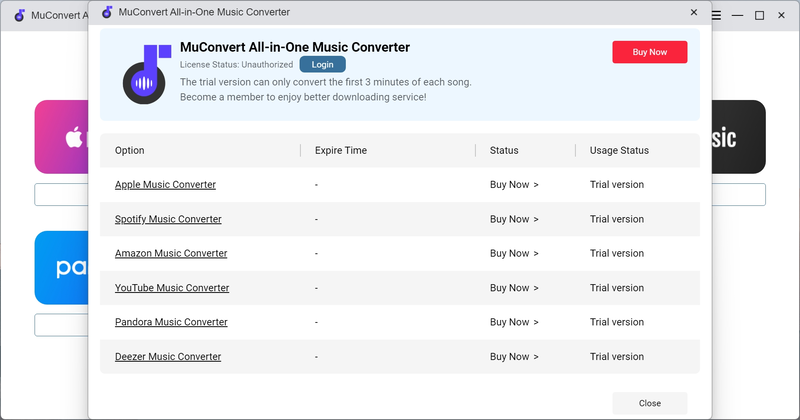
Launch the app and the registration window will pop up. Simply enter your email address (the one you used for purchasing) and the license code, hit the “Activate” icon, and successfully activate the registered version.
NOTE: If the registration window fails to pop up, access it by hitting the “Unactivated” icon on the top right of the software window.
How to Convert Songs/Playlist/Podcast to MP3/M4A/FLAC/WAV/AIFF/ALAC
MuConvert All-in-One Music Converter supports simple drag-and-drop operation within the page and download the selected items as MP3 and other common formats. The same applies to playlists, albums, and podcasts.
*The tutorial pictures use Spotify as an example.
Step 1. Log in to Your Account
Open MuConvert All-in-One Music Converter, choose the platform service you want to use, and log in to your account to the embedded Web Player.
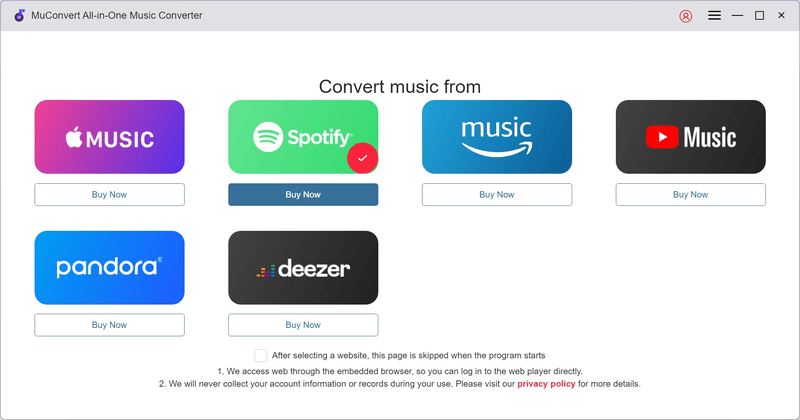
Free accounts can also log in to convert music;
MuConvert All-in-One Music Converter will only read and sync the music data in your account. It will not collect your private account information.
Step 2. Select Music/Playlist/Podcast to Convert
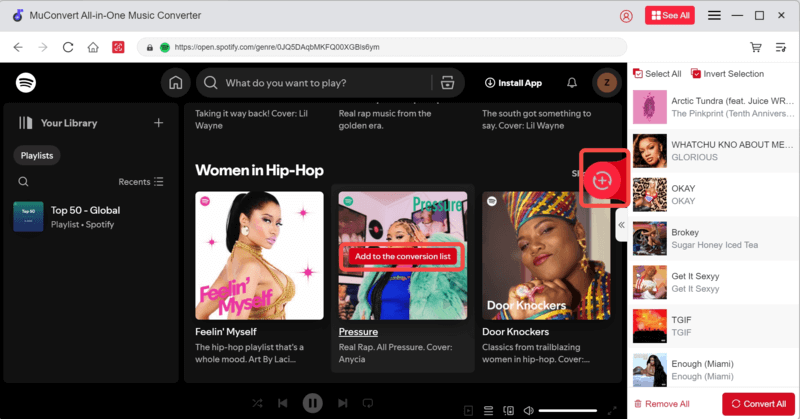
Choose from your music collections. Or enter keywords to search singles, playlists, albums, or podcasts you want to save. Then just drag the selections to the “Plus” button. MuConvert will automatically parse songs and add them to the download queue.
Step 3. Set up the Output Format
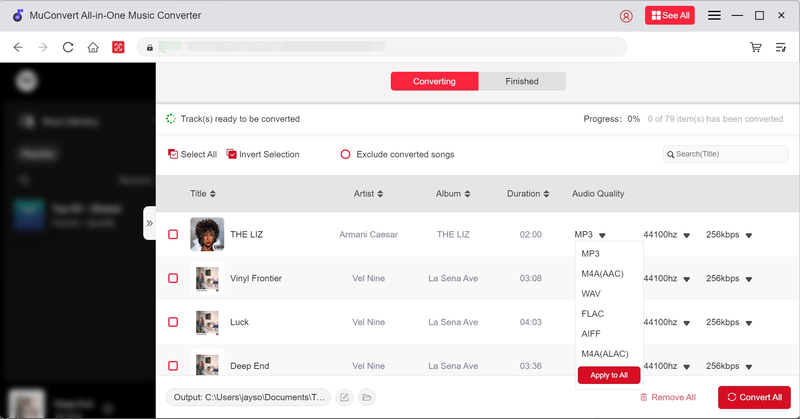
Click the “Convert all” button in the down right corner of the conversion window, and you can select the output format from MP3, M4A, FLAC, WAV, AIFF, and ALAC. This will be applied to all songs. If you want to set specific formats for different songs, simply select from the dropdown menu next to each song.
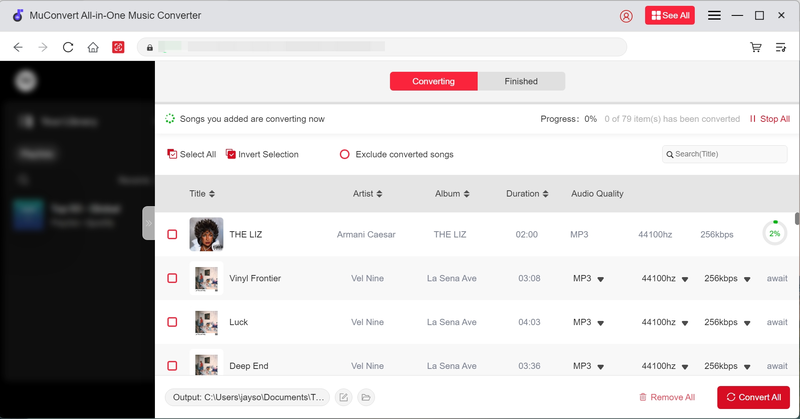
Step 4. Start to Convert Selected Music
When all settings are ready, click the “Convert All” button to start the conversion. It will not take a long time thanks to the batch download and hardware acceleration features.
Moreover, if you change your mind, you can stop the process for any song at any time. But when resuming the conversion, the download will start over.
Step 5. Play the Downloaded Music Files
For the output folder you’ve selected, go to the “Finished” section, where all download history will be listed. And the “View Output File” button will take you to the destination. Alternatively, you can play converted songs within MuConvert All-in-One Music Converter. Simply click the “Play” button to start playback.
How to Customize Output Folder and Parameters
In MuConvert All-in-One Music Converter, you can easily adjust bitrate and sample rate, and choose the output path according to your needs. Here is how it works.
Change Output Folder
MuConvert All-in-One Music Converter would save the downloaded songs in a default folder created by the software. But it also enables you to change the output folder for better management. To change the output folder for converted songs, two ways are available:
- Way 1: When you add some music for conversion, at the bottom of the conversion window, you can select one output folder to save the converted songs.
- Way 2: Go to the “Burger” menu in the upper right corner of the main interface and locate “Preferences”, where you can change the output folder under the “General” tab.
Notably, the latest version of MuConvert Spotify Music Converter enables you to customize tags to generate output filenames with a unified format. Additionally, it can archive songs by playlist, artist, and album. This way, all your conversions will orderly be sorted into different folders based on the types.
Customize Output Parameters
Bitrate and sample rate customization are pretty much the same as changing where your files go, as detailed below.
Step 1. Navigate to the “Burger” menu > “Preferences”;
Step 2. Select “Advanced” and you can see the “Bitrate” and “SampleRate” options.
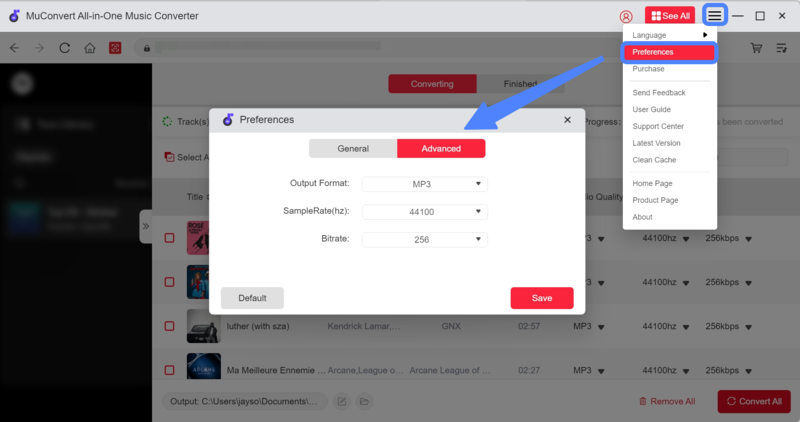
Advanced Settings
MuConvert All-in-One Music Converter comes with a default bitrate of 256 kbps and a sample rate of 44.1 kHz, which are the most recommended settings for bitrate and sample rate. However, to provide you with superior listening and to ensure crystal-clear audio quality for all output formats, lossless options of 44.8 kHz and 320 kbps are also supported.
How to Change Language and Manage History in MuConvert
If you have questions about the interface display or download history in MuConvert All-in-One Music Converter, here are the answers and settings instructions.
Change Software Language
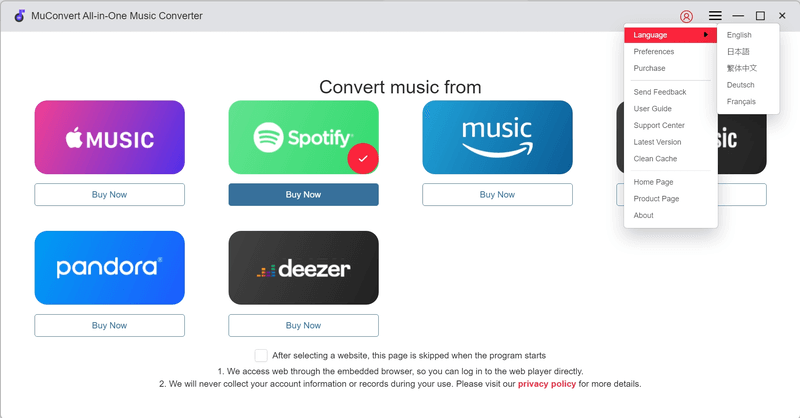
MuConvert All-in-One Music Converter uses the web player as its main screen, and you can’t change how it looks. However, the display language can be adjusted, with options including English, French, German, Japanese, and traditional Chinese.
To change the software language, you need to go to “Burger Menu” > “Language” to select the language you want to apply to the software to make it more convenient and eliminate any language barriers.
Manage Conversion History
MuConvert All-in-One Music Converter keeps all the conversion history for you to access the converted songs conveniently. When you need to manage history, you can follow the steps to check:
Step 1. Open the conversion window by hitting the icon next to the “Burger Menu” button.
Step 2. Under the “Converting” tab, you can check whether there are still songs in the conversion process.
Step 3. Navigate to the “Finished” section, all the downloaded songs will be listed here. You are available to quickly locate the output folder by clicking “View Output File”. To delete all the conversion records, simply tick and submit “Delete” to clear them.
The “Clear Cache” option in the “Burger Menu” will only clear account information and does not delete conversion history.
How to Update MuConvert All-in-One Music Converter
MuConvert All-in-One Music Converter offers a simple setup process for you to grasp. Here is a brief guide for you.
When MuConvert All-in-One Music Converter has a new version released, you will receive an update notification while opening the software. Simply check for updates and it will automatically install the latest version for you.
To manually update the software, you need to go to “Burger Menu” > “Check Update” to enable the software to retrieve the updated version. If it has detected a new version, you simply need to submit updating the software.
- How to Download Spotify Music to USB Free for Car Playing
- How to Burn A CD from Spotify [Really Work!]
- How to Make Ringtone from Spotify Song on Phone: Fast & Free
- How to Use Spotify Alarm Clock on iPhone/Android/Smart Speaker
- How to Make Rainmeter Spotify Visualizers Work
- How to Use Spotify with Virtual DJ