


How to Register MuConvert Deezer Music Converter
MuConvert Deezer Music Converter provides a free trial and full versions for you to select. The free trial lasts 14 days. During the free trial, you can use all the functions to download the first 3 minutes of each Deezer song.
If you are satisfied with the service provided by MuConvert, you can subscribe to the full version to save full-length Deezer content. To register MuConvert Deezer Music Converter, follow the below instructions.
Step 1. Install MuConvert Deezer Music Converter
Click the button below to download and install MuConvert on your computer.
Step 2. Purchase the License Key
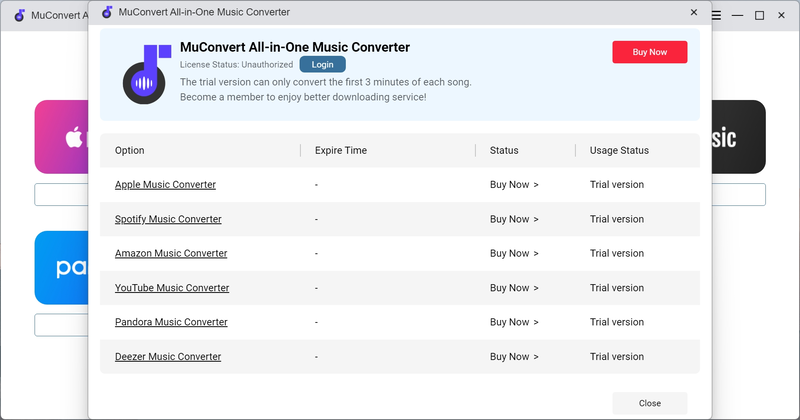
Launch MuConvert Deezer Music Converter. A pop-up registration window will appear. Simply click the “Buy Now” button. You will be redirected to a webpage. Then select your preferred registered plan and proceed with the purchase. Once you successfully make a payment, you will receive a confirmation email with the license key.
Step 3. Activate MuConvert Deezer Music Converter
Once you get the license key, navigate to the software. You are ready to activate the full version of MuConvert Deezer Music Converter.
-
For license code holders:
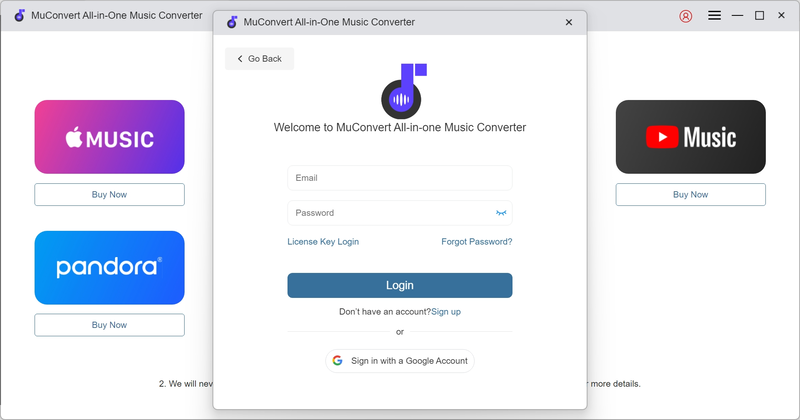
On the pop-up registration window, click the “Login” button and choose “License Key Login”.
Then enter your email address (the one you used for purchasing) and the license key. Then
click “Login” to activate the full version of MuConvert Deezer Music Converter.
-
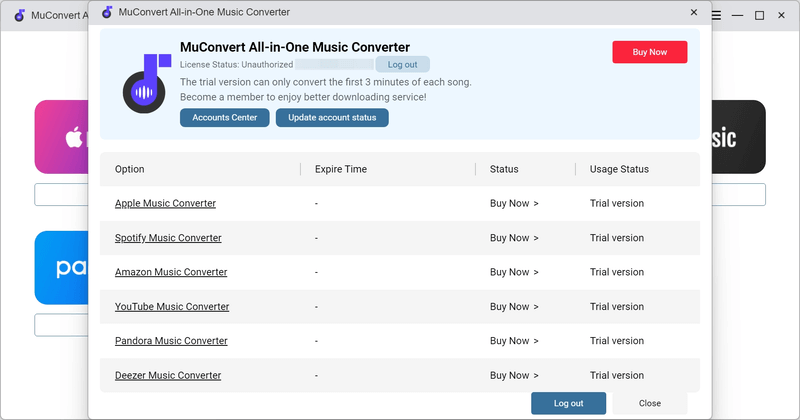
For MuConvert account owners:
On the pop-up registration window, simply click “Update account status” to refresh your
subscription status.
How to Convert Deezer Music/Playlist/Podcast to MP3/M4A/FLAC/WAV/AIFF/ALAC
MuConvert Deezer Music Converter allows you to just give one simple click to convert Deezer individual songs, albums, playlists, or podcasts to MP3.
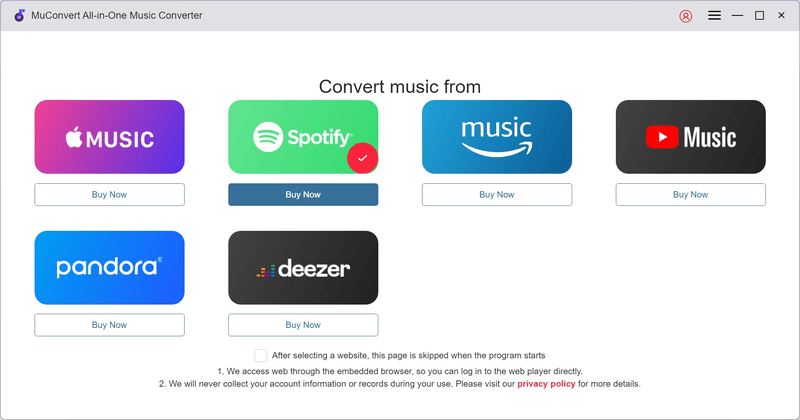
Step 1. Log in to Your Deezer Account
Open MuConvert Deezer Music Converter. Select “Deezer” as your desired streaming service. Then you will be navigated to the embedded Deezer web player. Click the “Login” icon to log into your Deezer account with your credentials.
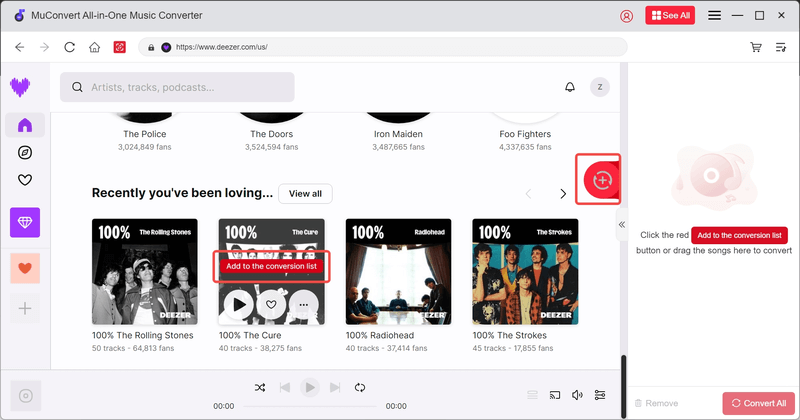
Step 2. Select Deezer Music/Playlist/Podcast to Convert
Simply browse the homepage to find your wanted singles, playlists, albums, or podcasts. To add them to the conversion list, you can go for one of the following methods:
- Way 1: Click the “Add to the conversion list” button over the song/album/playlist/podcast.
- Way 2: Drag and drop the Deezer content to the “+” button.
Then MuConvert will automatically parse the Deezer content and add it to the converting queue.
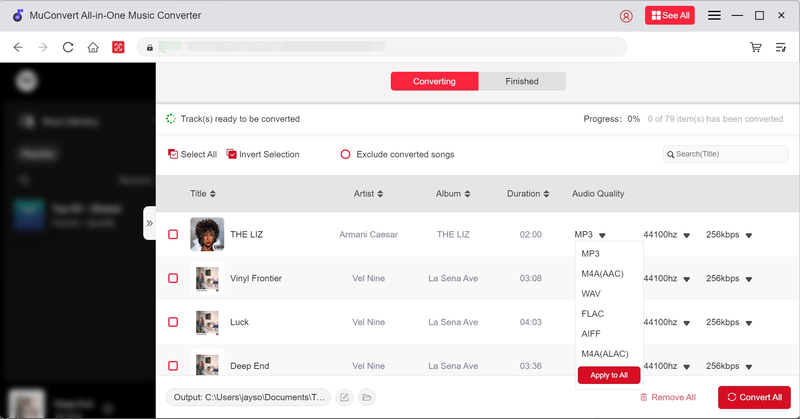
Step 3. Set Output Format for Deezer Downloads
In the “Converting” window, you can choose the output format (MP3, M4A, FLAC, WAV, AIFF, or ALAC) for each song. You can also apply these settings to all songs at once.
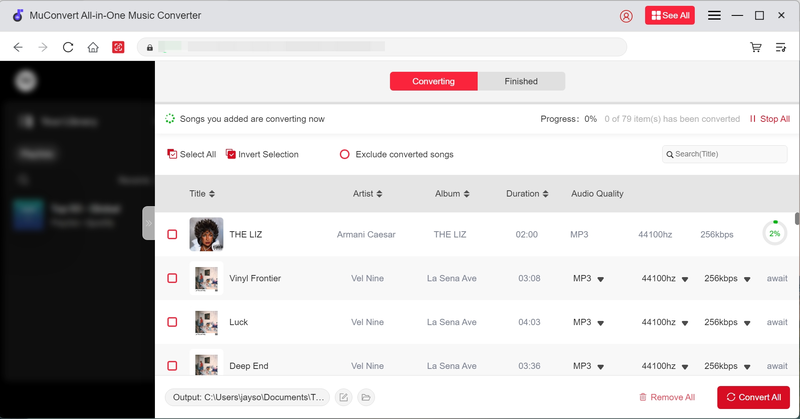
Step 4. Start to Convert Selected Deezer Songs
Once everything is set up, click the “Convert All” button to start the conversion. You can stop and restart the process for any Deezer song at any time.
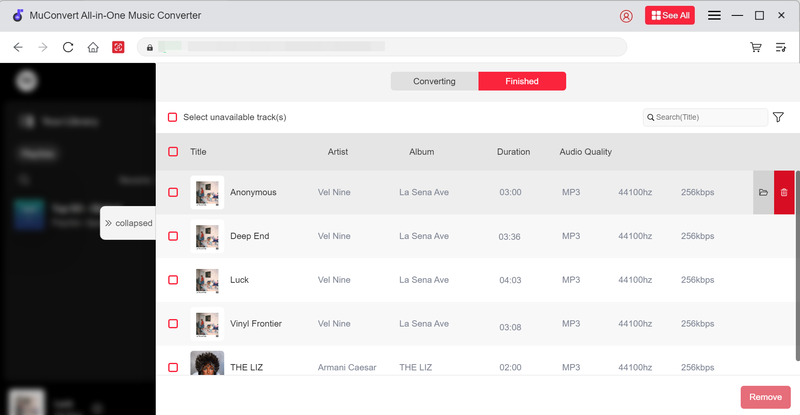
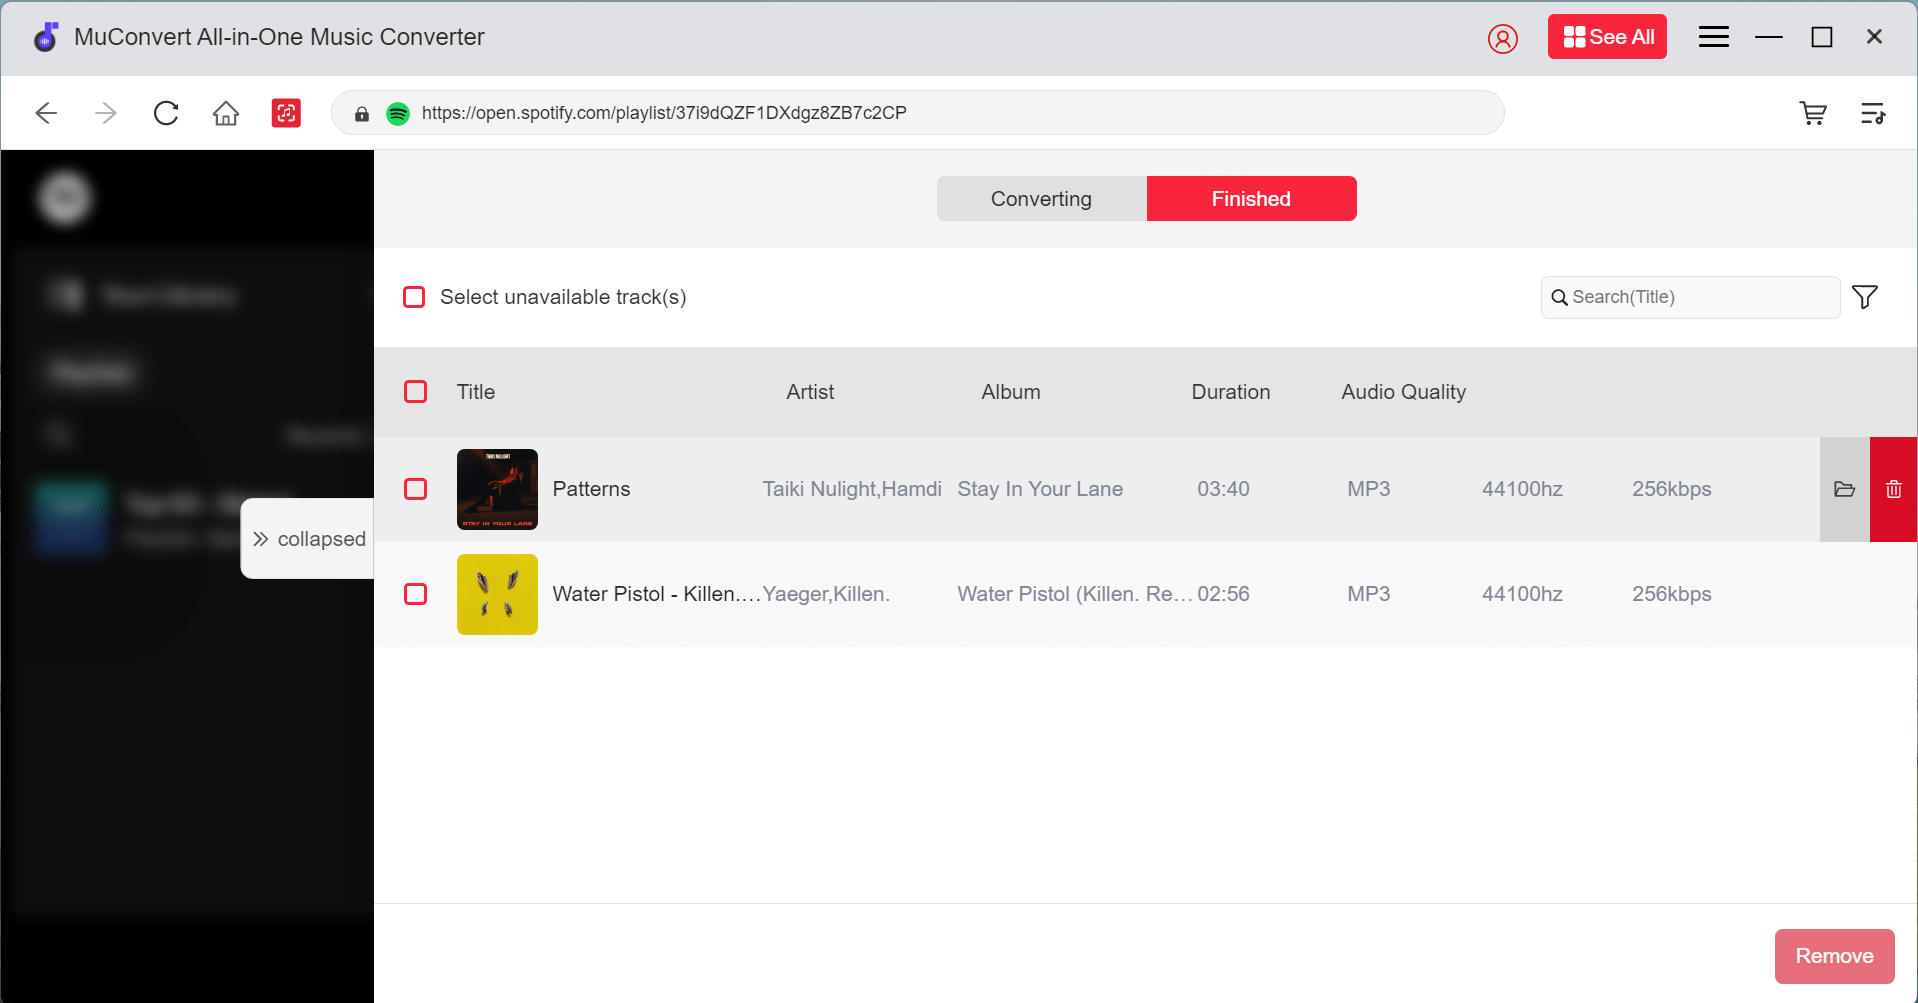
Step 5. Access the Converted Deezer Music
When finished, go to the “Finished” window. Click the “View Output File” button to access the converted Deezer songs.
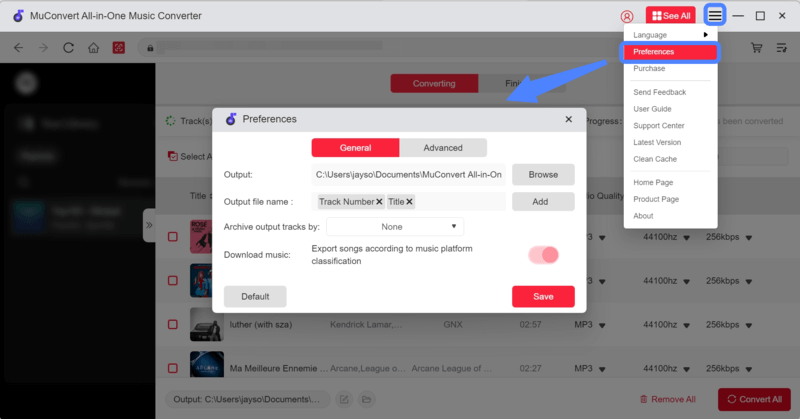
How to Customize Output Folder and Parameters
To enhance your listening experience, MuConvert Deezer Music Converter enables you to customize bitrate, sample rate, output path, etc. Check out this section to see how it works.
Change Output Folder
By default, MuConvert Deezer Music Converter would save the converted Deezer songs in an output folder created by the software. You can also change the default output folder to your desired one. To change the output destination, there are 2 ways to do so.
-
Way 1:
In the “Converting” section of the “conversion list”, click the folder icon at the bottom
left to select your wanted folder as the output folder.
-
Way 2:
Click the “Burger” menu icon in the upper right corner of the main interface. Click “Preferences” > “General”.
Then choose “Browse” for “Output” to find your desired destination.
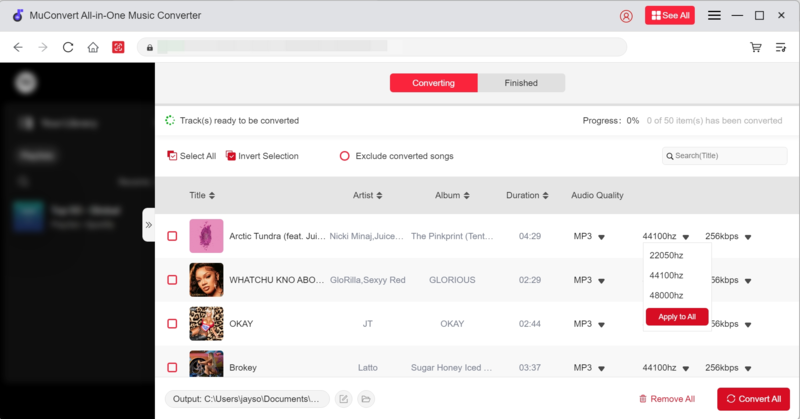
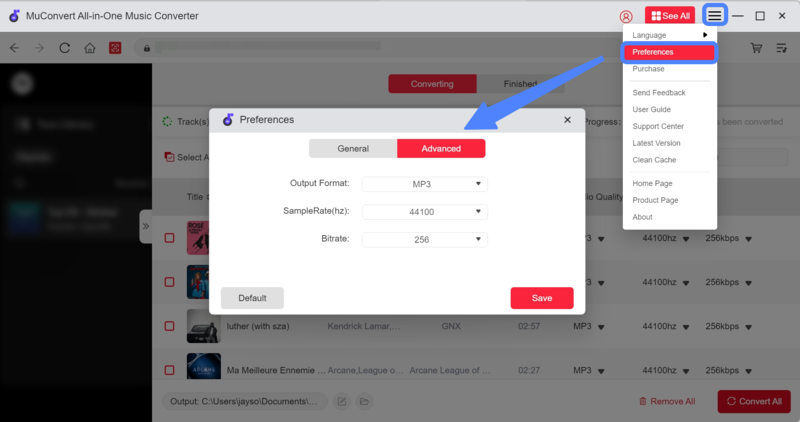
Customize Output Parameters
With MuConvert, you can tweak the bitrate up to 320kbps and the sample rate up to 48000 Hz to get lossless-quality Deezer tracks. Follow one of the methods below to make it happen.
-
Way 1:
In the “Converting” section of the “conversion list”, under the “Audio Quality” tab, you can
set the sample rate and the bitrate to your preferences. You can also apply the settings to
all Deezer songs in the list.
-
Way 2:
Click the “Burger” menu icon, then go to “Preferences” > “Advanced”. Choose your options from
the drop-down menus of “SampleRate” and “Bitrate” respectively.
How to Change Language and Manage History in MuConvert
In addition, you can change the display language and manage your Deezer downloads to streamline your downloading experience with MuConvert.
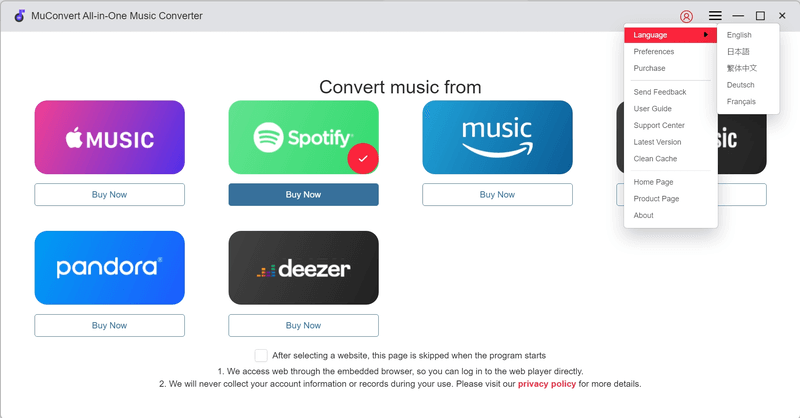
Change Software Language
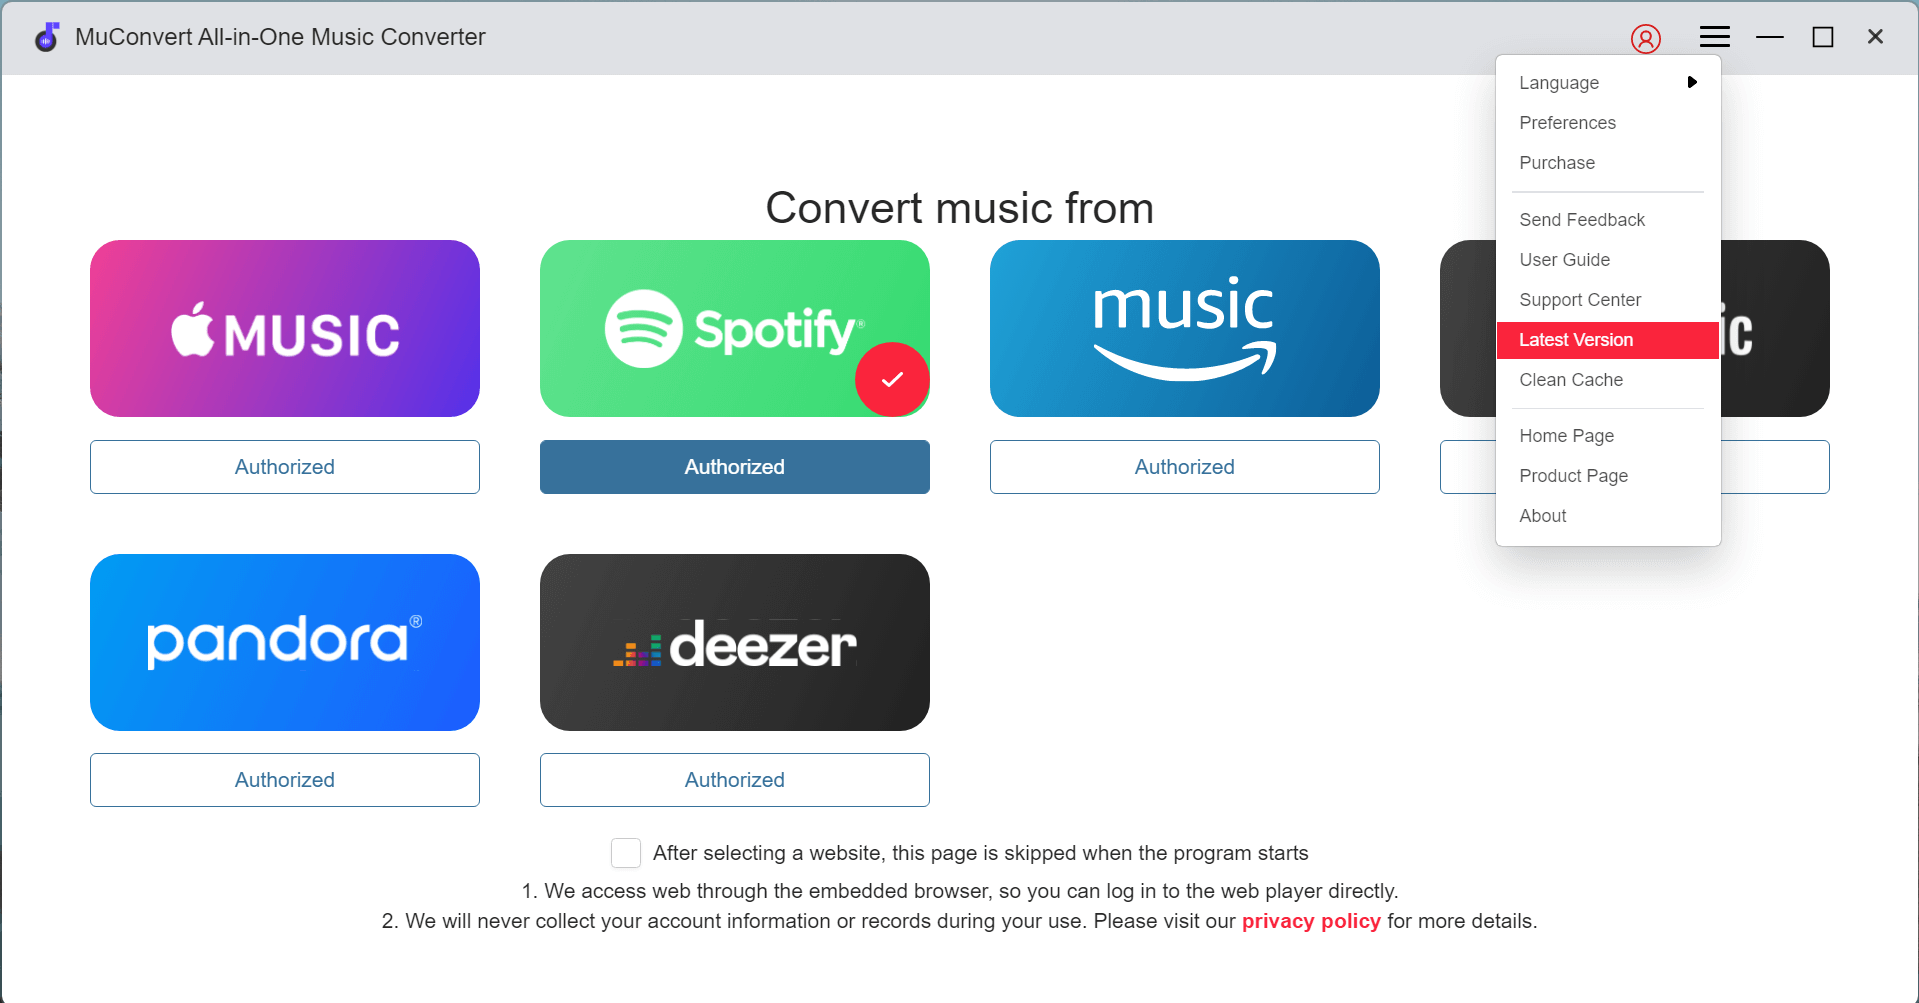
You can easily adjust MuConvert’s display language, with options including English, French, German, Japanese, and Chinese. To change MuConvert’s display language, click the “Burger” menu icon, and select one option from the list of “Language”.
Although the Deezer web player is embedded in MuConvert, its display language is tied to your Deezer account settings and cannot be changed within MuConvert.
Manage Conversion History
MuConvert Deezer Music Converter will automatically keep the conversion history. You can choose to remove Deezer downloads from History or delete converted Deezer songs from the disk in the “Finished” section of the “conversion list”.
- Delete a single record: Click the trash icon of the specific song, and choose your preferred option.
- Delete multiple records: Simply tick all the boxes and click “Delete” to remove them. To delete all records, tick the box next to “Title” and confirm.
The built-in cache clear option can not delete conversion history. It can only clear account information.
How to Update/Uninstall MuConvert Deezer Music Converter
MuConvert Deezer Music Converter offers a simple process for you to complete updates or uninstallation.
Update MuConvert Deezer Music Converter
To regularly fix bugs and make improvements, MuConvert Deezer Music Converter keeps updating its functionalities. To always get the latest versions, you can opt for auto-update or manually check whether the latest version is available.
- Auto-update the software: When a new version is released, you will receive a pop-up notification once opening MuConvert. Simply confirm your choice and complete the update.
- Manually update the software: Click the “Burger” menu icon, and choose “Latest Version”. If a new version is available, you will get a notice and then choose to upgrade the software to the latest version.
Uninstall MuConvert Deezer Music Converter
If you don’t want to go with MuConvert Deezer Music Converter anymore, you are free to uninstall the software. The uninstallation process differs for Windows and macOS.
- Windows: Go to “Start” > “Apps” > “Installed App”. Find or search for MuConvert, click the three dots, and select ‘Uninstall’ to proceed.
- Mac: Quit MuConvert before continuing. Launch “Launchpad” in the “Dock” or “Applications folder”. Find or search for MuConvert. Click and hold any app until the apps jiggle. Hit the “X” deletion button on MuConvert and click “Delete” to confirm.
If you want to download high-quality Deezer songs with MuConvert in the future, don’t hesitate to download the latest version of MuConvert Deezer Music Converter.
- How to Download Spotify Music to USB Free for Car Playing
- How to Burn A CD from Spotify [Really Work!]
- How to Make Ringtone from Spotify Song on Phone: Fast & Free
- How to Use Spotify Alarm Clock on iPhone/Android/Smart Speaker
- How to Make Rainmeter Spotify Visualizers Work
- How to Use Spotify with Virtual DJ