Apple Music has provided millions of songs for people to enjoy with the best quality online. However, it won’t detect your local audio, such as the recordings, demos, or music resources saved from other platforms, so that you still have to play them separately. As a result, some people would wonder if there is a way can help them add their own music to Apple Music, so they can enjoy all the songs together within the app.
To help these users in need, the article will provide detailed tutorials teaching you how to add your own music to Apple Music for playback on all devices. You can have a look and follow to operate on Windows, Mac, and iPhone separately.
Part 1: How to Add Your Own Music to Apple Music
Instead of using Apple Music to listen to songs, you may have your own tracks in your local collection and they are not available on the service. To listen to these songs on Apple Music on any device you like, you can import your own music files to iTunes and sync them to the Apple Music library. Below are the detailed steps.
1. Add Local MP3 Files to Apple Music on Windows
For Windows users, you may have tons of tracks on your PC and want to add these MP3 music files to Apple Music. For detailed steps, the guide below is pretty clear. Get your Windows computer ready to process it!
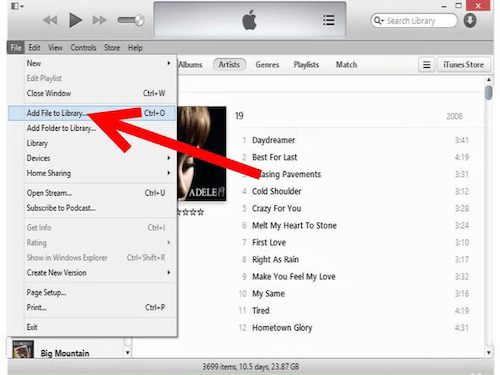
Step 1. Open the iTunes app first. Then go to “File” >> “Add File to Library” or “Add Folder to Library” to import the local audio files to your iTunes Library.
Tip: You can also drag the files or folder to the interface for directly importing conveniently.
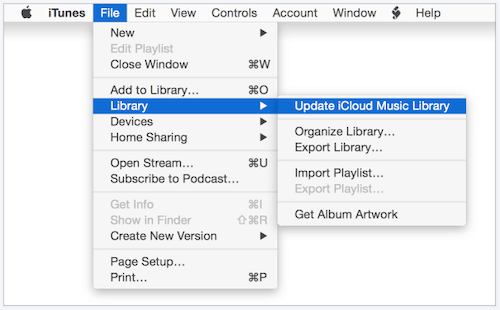
Step 2. Next, to update the Library, go to “File” again and select “Library” this time. Choose “Update iCloud Music Library”. In this way, your music files will be stored in iCloud.
Step 3. Now, turn on the “Sync Music” option in Apple Music on both your computer and the device you want to listen to the songs. Keep in mind that syncing music requires subscriptions to Apple Music.
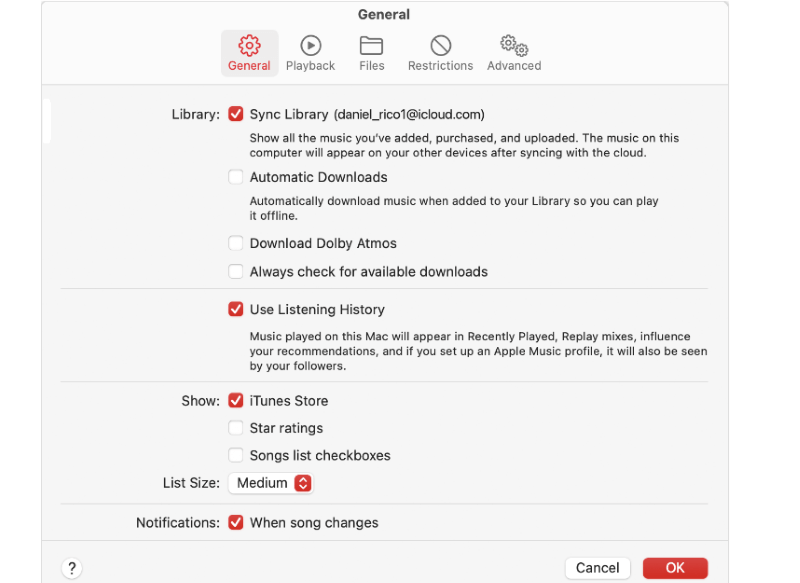
To turn on the option, open the Apple Music app and log in to the account that has subscribed to Apple Music.
Choose “Music” > “Settings“. Click the “General” tab. Select “Sync Library” >> “OK“. Finally, you can stream them on any device connected with the same iCloud account.
2. Add Songs to Apple Music on Mac
While iTunes is no longer available on newer Mac systems since 2019, Mac users can import local songs from macOS to Apple Music. Follow these steps to get it done:
Step 1. Open the Apple Music app on your Mac computer. Then choose “File” from the menu bar and select the “Import” option.
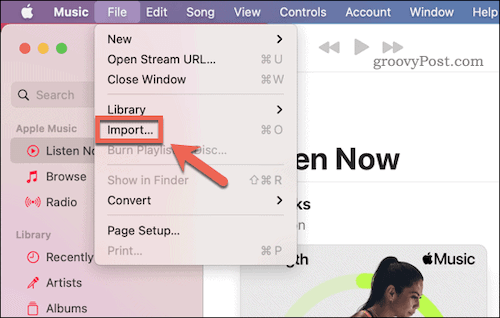
Step 2. Then you will need to select the music files or folders on your Mac. Click “Open” to import them to the app.
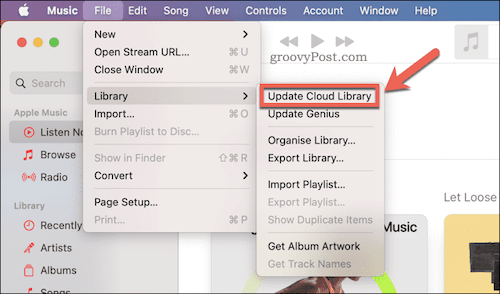
Step 3. After the local music files are added, go to “File” and select “Update Cloud Library” this time. Then your local music files will be added to Apple Music’s cloud collection.
Step 4. The final step is to turn on the “Sync Music” in Apple Music on your devices to access these songs. Open the Apple Music App. Click “Music” > “Settings” > “Preferences” > “General“. Then choose “Sync Library“.
3.Add Downloaded Music to Apple Music on iPhone/Android
If you have a lot of audio files on your iPhone or Android, you can add these MP3 music files to Apple Music on mobile devices.
Step 1. First, connect your mobile device to the computer via a USB.
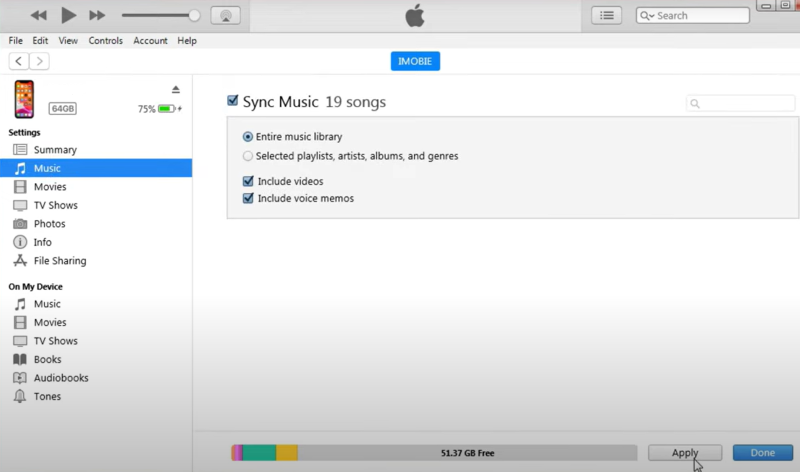
Step 2. Run iTunes on your computer. Click “File” > “Add File to Library“. Choose the song you want to add and click”Open“. Then, click the phone icon in the upper right corner.
Step 3. Choose the “Music” tab on the left side. Click “Sync Music“. Now the music files on your iPhone/Android will now be added to the Apple Music app.
Part 2: How to Add Local MP3 Files to the Apple Music App
Because Apple’s streaming music resources are all encrypted by DRM, you can’t directly save them as local MP3 files for uploading or transferring to other devices of different Apple Music accounts. But with the assistance of an Apple Music ripper, MuConvert Apple Music Converter, you can bypass such an obstacle.
MuConvert Apple Music Converter allows Apple Music subscribers to download all music resources such as single tracks, playlists, and albums as regular DRM-free MP3 files in Apple lossless quality offline. Its 10X faster batch downloading speed attributes much higher productivity to make it easier if you want to add local MP3 files to the Apple Music app.
Sparking Features:
- Download playlists, songs, albums, etc from Apple Music with ease.
- Download all songs and playlists in a batch with one tap.
- Bypass Apple Music DRM in one shot effortlessly.
- Customized quality options are provided to export Apple Music MP3 files for flexible playback.
- Batch download Apple Music playlists at 10X faster speed effortlessly.
- Keep ID3 information to manage MP3 local files across devices conveniently.
Download Apple Music as MP3 Local Files
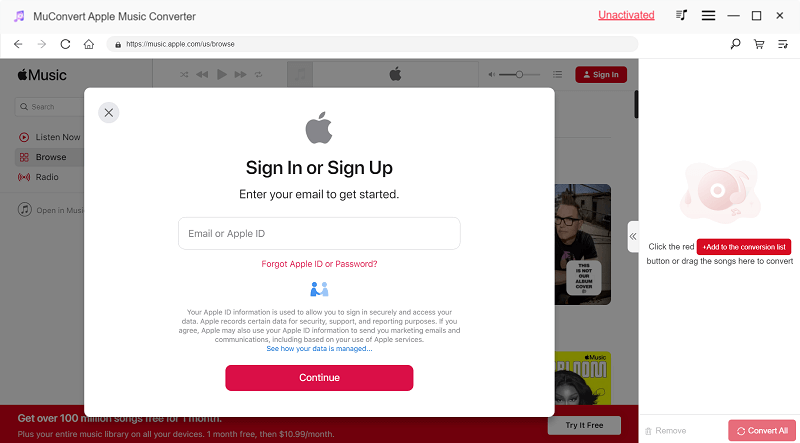
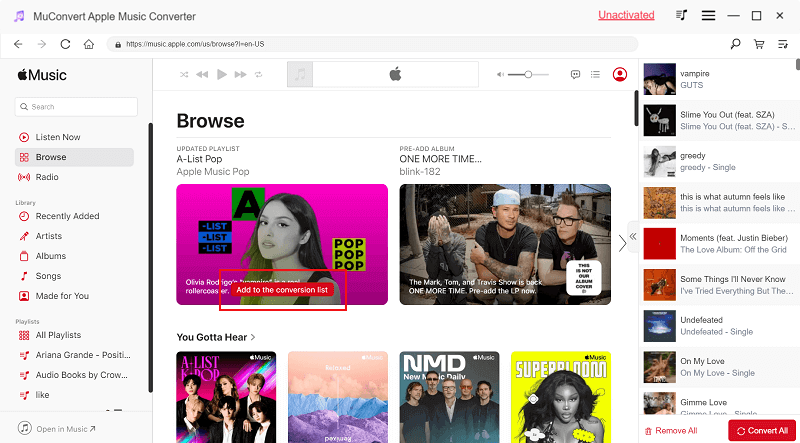
Step 1. Run MuConvert Apple Music Converter on Windows/Mac. Once you enter the built-in Apple Music web player from the home screen, you need to log in with your Apple Music account.
Step 2. Browse the web player and find any Apple Music song or playlist you wish to download as MP3 local files. Click the “Add to the Conversion List” over the music.
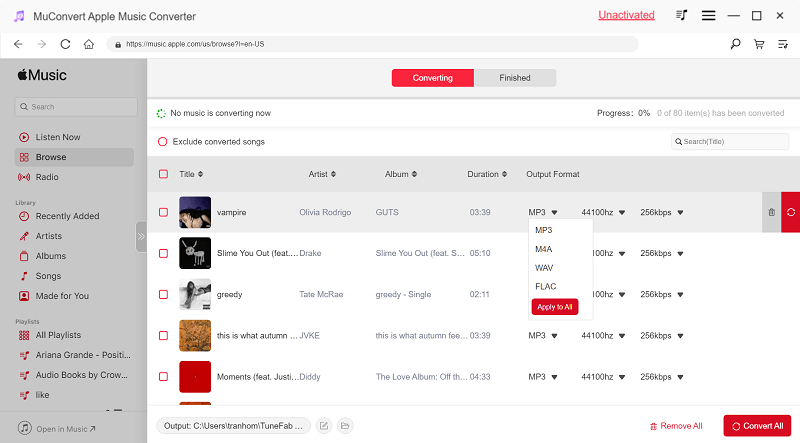
Step 3. Select “MP3″ as the output format, then adjust both “SampleRate” and “Bitrate” to determine the music quality as you like.
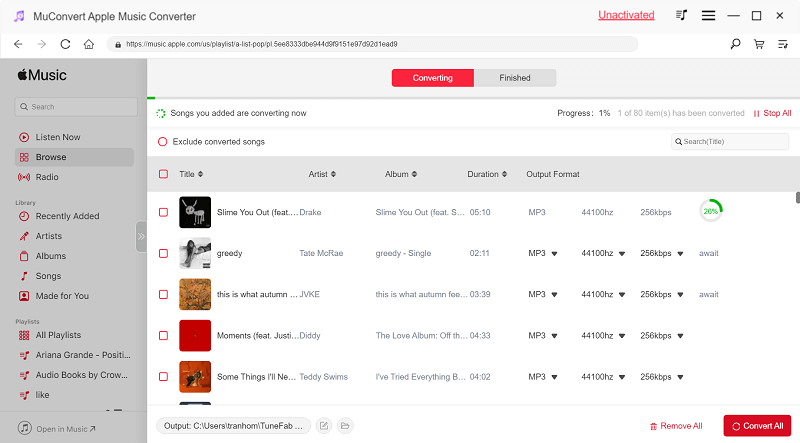
Step 4. Eventually, tap the “Convert All“ button to start downloading the Apple Music tracks as local MP3 files. Once completed, you can access the MP3 local files under the “Finished” tab.
Step 5. Now the tool has removed the DRM from the Apple Music songs and downloaded them to MP3. If you want to listen to these songs on Apple Music without worrying about your subscription being expired, simply follow the introduced steps in Part 1 to add them to Apple Music.
FAQs about Apple Music
Q1: How to add a family member to Apple Music?
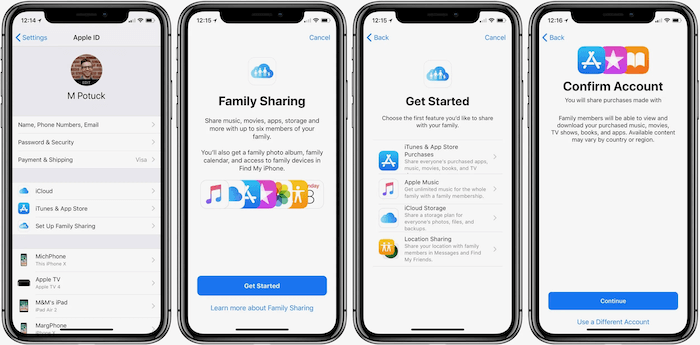
Apple Music allows you to share your music playlists with your family through the Apple Music family plan. You can follow the steps here to easily add a family member to your Apple Music family group easily (here we take the steps on iPhone devices as an example):
Step 1. Go to “Settings“ on your iPhone.
Step 2. Tap “your profile“ >> “Family Sharing“.
Step 3. Select “Add Member“ >> “Invite People“ (or “Create an Account“). Then follow the on-screen instructions to add your family member to join the group step-by-step.
Q2: How to add Spotify playlists to Apple Music?
For Spotify users who want to switch to Apple Music, you must not want to lose your created playlists and wish a way to transfer them from Spotify to Apple Music.
To process this, you only need to download Spotify playlists first with MuConvert Spotify Music Converter, then add music to the Apple Music app for streaming later. For more detailed steps, check this post: Transfer from Spotify to Apple Music.
Conclusion
It is not a difficult task to add music to Apple Music regardless of what devices you are using, as the 3 methods are provided for iPhone, Android, Windows, and Mac users to try. In addition, it is also recommended to download Apple Music as MP3 using MuConvert Spotify Music Converter, so you can keep them permanently and play them whenever you want flexibly. The program is free to install now:
Convert Apple Music to MP3 Losslessly
Remove DRM from Apple Music songs and convert them to MP3 without quality loss.
More Posts
8 Best Apple Music Converter Detailed Review [App/Online] Read More » How to Remove DRM from Apple Music [New Updated!] Read More » How to Convert Apple Music to MP3 [2026 Updated] Read More » How to Convert M4P to WAV Lossless in 2025 [4 Ways] Read More »