As a music lover, you are probably using more than one music streaming platform so that you can access as many music resources as possible. But when you decide to switch platforms, like from Spotify to Apple Music, you will get into trouble and won’t know how to bring all your favorite Spotify playlists to Apple Music at one time. So, this article mainly helps you solve this problem. There are actually different ways available for you to transfer Spotify playlists to Apple Music just by clicks. Now, keep reading and see how you can do it.

Best Way to Convert Spotify Playlists to Apple Music on Windows/Mac
To help you switch from Spotify to Apple Music easily, there are many music transfer tools developed to help you. But the music resources on the two music platforms are not entirely the same due to copyright reasons, you can’t move any Spotify song to Apple Music when the music is not available on the latter one. Therefore, to transfer a full Spotify playlist to Apple Music, the best way for you is to download Spotify playlists to DRM-free audio files, then import them to Apple Music and realize a complete playlist transfer.
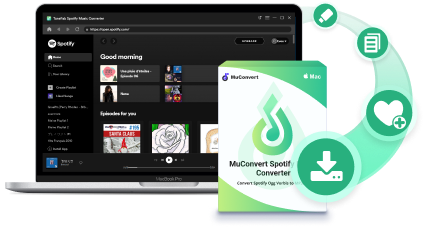
So the key process of this solution is to remove the DRM protection from Spotify playlists. Referring to this, MuConvert Spotify Music Converter provides the best service to help. Embedded with the official Spotify web player, this top-rated Spotify downloader can help you access all Spotify music for downloading offline. When it offers the most commonly-supported formats such as MP3, you can then transfer the Spotify downloads to Apple Music without limitations.
Also, MuConvert Spotify Music Converter will ensure the best offline music quality, which can ensure that you can transfer Spotify playlists to Apple Music in lossless quality and have the best music playback experience on Apple Music.
MuConvert Spotify Music Converter offers a 30-day free version to let you download Spotify music to MP3 at no cost. Be you a free user or a Spotify subscriber, you can install the tool for free and transfer Spotify to Apple Music immediately!
- Spotify playlist auto-analysis – By embedding the Spotify web player into the software, this best Spotify playlist downloader offers you the simplest way to download Spotify songs to MP3. All you have to do is log in to your Spotify account and one click to auto-parse music and download it.
- 35X faster conversion speed – MuConvert Spotify Music Converter is able to manage the Spotify playlist conversion with at least 35X faster speed. The batch conversion feature also enlightens the great efficiency.
- Preservation of ID3 tags and metadata – All the ID3 tags and metadata info of Spotify songs will be retained, thus you are able to manage the downloaded Spotify songs easily by virtue of the preserved data.
- Best audio quality guaranteed – MuConvert Spotify Music Converter will keep the Spotify tracks at their best quality for offline playback. The highest 320kbps bit rate can be selected to convert Spotify playlists.
- Edit output file names and folders flexibly – To simplify offline music management, our software now lets you edit file names and apply tags to title and categorize your Spotify downloads, saving you time to manage your local music library.
Now, follow this brief guide to convert Spotify playlist to MP3 via MuConvert Spotify Music Converter, and then transfer Spotify Music to Apple Music freely just by very easy clicks.
STEP 1. Install MuConvert Spotify Music Converter
Download MuConvert Spotify Music Converter on your computer. Following the onscreen instructions, go through the easy setup process to install the software.
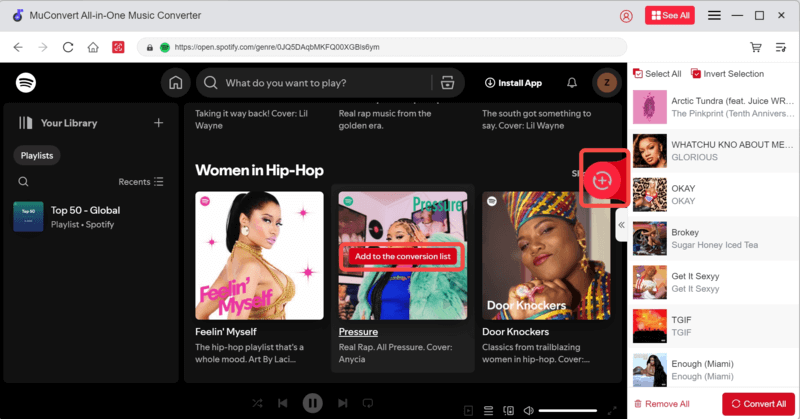
STEP 2. Log in to Spotify Web Player
Hit the “Open the Spotify web player” and enter Spotify web player. Now, you need to log in to your Spotify account, and the Spotify library will be synced. Then drag the playlist you want to transfer to Apple Music to the “Plus” button.
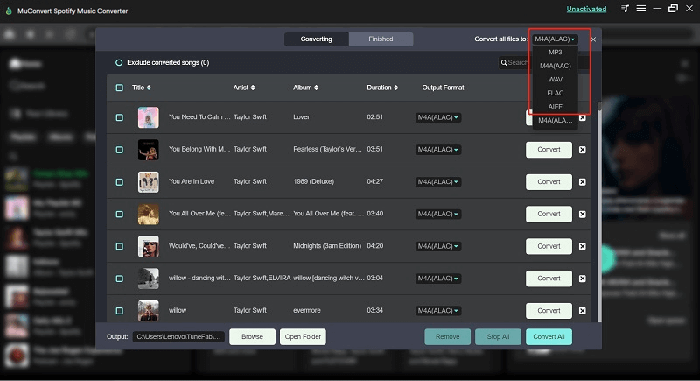
STEP 3. Select Output Format
After the Spotify playlist is analyzed, you are able to select an output format. Simply move up to the top right corner and select MP3 as the output format because it is the most widely-supported audio format, and surely helps you to transfer Spotify playlist to Apple Music successfully.
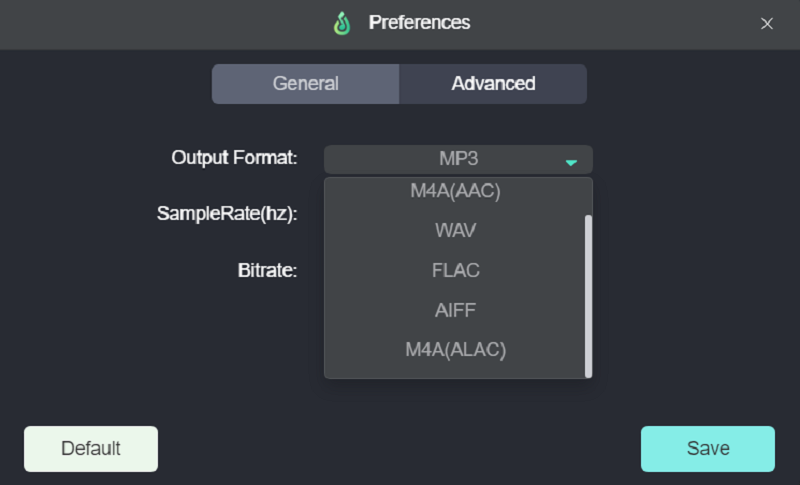
STEP 4. Advanced Settings (Optional)
Navigate to “Settings” and enter “Preferences” settings. You are able to customize more advanced output settings such as SampleRate and Bitrate. Also, switch to “General”, you can also select an output folder from here.
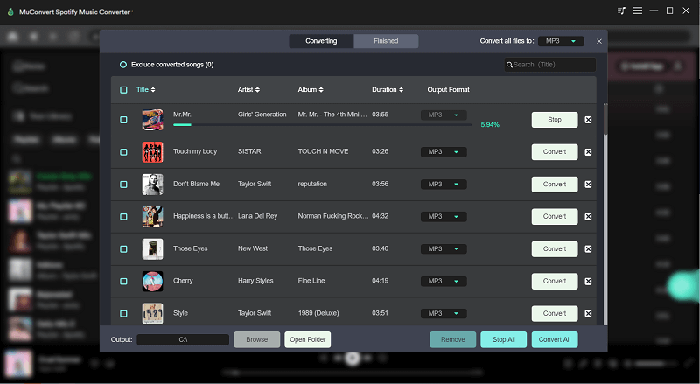
STEP 5. Convert Spotify Playlist to MP3
Finally, hit the “Convert All” button, and the selected Spotify songs will all be converted to MP3 in batches. When the conversion completes, Spotify songs will be accessed by clicking the “View Output File” button.
STEP 6. Transfer Spotify Playlist to Apple Music
When you get the downloaded Spotify playlists, you can begin to transfer playlists from Spotify to Apple Music immediately:
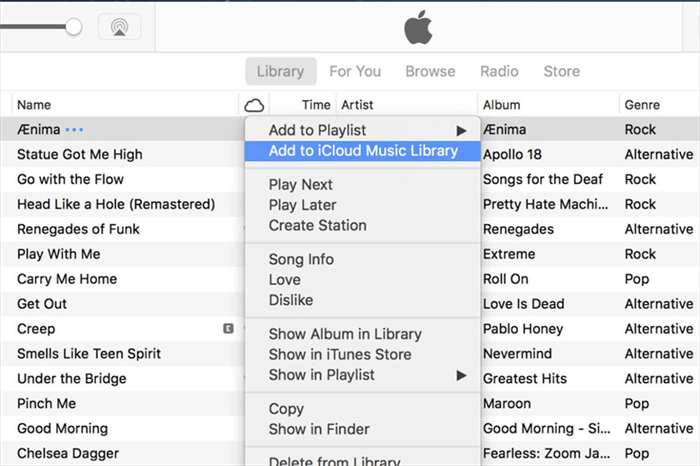
On Windows: Use iTunes and sign in to your Apple ID. By going to “Menu” > “Add File to Library”, you can import the MP3 Spotify playlist first. Then just right-click on the songs and click “Add to iCloud Music Library”. The Spotify playlist will be directly added to your Apple Music account.
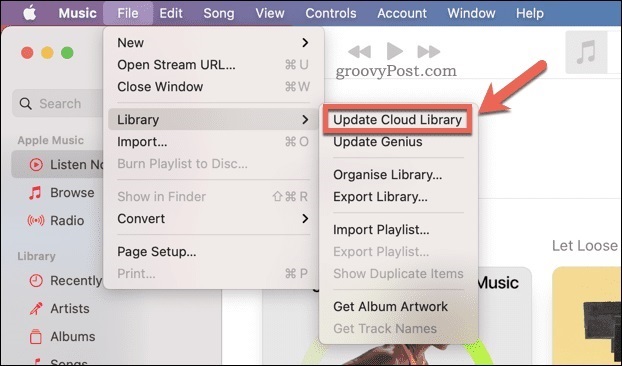
On Mac: Open the Music app on Mac and select “File” > “Import” to import downloaded Spotify playlists. Once transferred Spotify to Apple Music, press “File” > “Update Cloud Library” to add music to your Apple Music cloud.
Transfer Spotify Playlists to Apple Music on iPhone/Android
Instead of syncing Spotify to Apple Music on computers, there are also helpful tools working for iPhone and Android devices to let you easily transfer Spotify playlists to Apple Music directly. Now, keep reading and seeing how they can help.
These Spotify to Apple Music transferring tools can only move Spotify songs with the same resources provided on Apple Music. If you want to transfer all Spotify playlists to Apple Music, MuConverter, the best Spotify playlist downloader can better help.
Method 1. SongShift
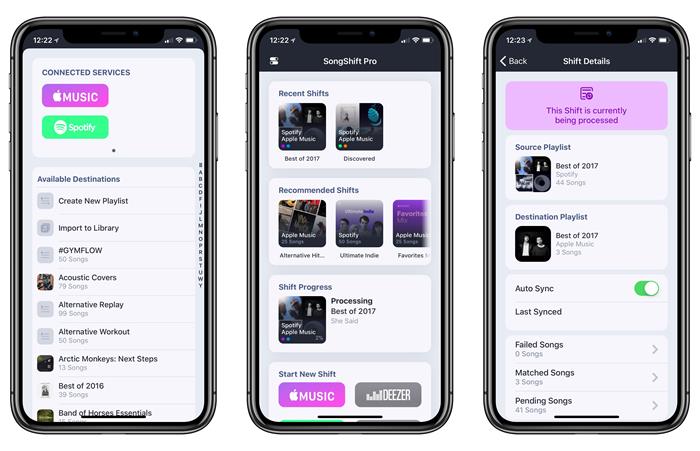
SongShift is a mobile app only available on iOS devices. It can help you transfer singles, playlists, and albums among 12 popular music platforms such as Spotify Music, Apple Music, Deezer, and so on. Thus, you can use the app to switch music from Spotify to Apple Music with ease. Here is how it helps you transfer playlists from Spotify to Apple Music.
STEP 1. Install and launch SongShift on your phone, hit the “Get Started” icon, and select Spotify platform on the main interface.
STEP 2. You need to log in to your Spotify account to access your Spotify playlist. Select the playlist you want to transfer to Apple Music and tap the “Continue” icon.
STEP 3. In the next screen, choose “Create New Playlist” and select Apple Music as the destination service. Tap “OK”.
STEP 4. Finally, simply hit the “Process” icon and wait for the shifting process to complete.
Method 2. FreeYourMusic
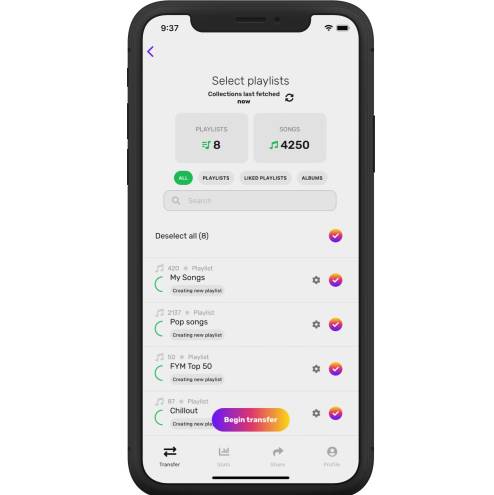
FreeYourMusic can help you transfer Spotify to Apple Music if you are using an Android device. More than Android, FreeYourMusic also supports Windows, Mac, Linux, and iOS. Like SongShift, this app can also help to transfer different types of Spotify music, be it a single song or a whole playlist. You can now follow the tutorial below to transfer your Spotify playlist to Apple Music immediately.
STEP 1. Use your browser to access Free Your Music to begin transferring.
STEP 2. Go to the “Select Source” page, choose “Spotify” and then log in. You are supposed to give the tool permission to access your account.
STEP 3. Click “Apple Music” on the “Select Destination” page. Then choose the Spotify songs or playlists you want to convert.
STEP 4. Tap “Begin” to transfer, then just wait for a few minutes until the playlists finish being transferred.
Transfer Playlists from Spotify to Apple Music Online
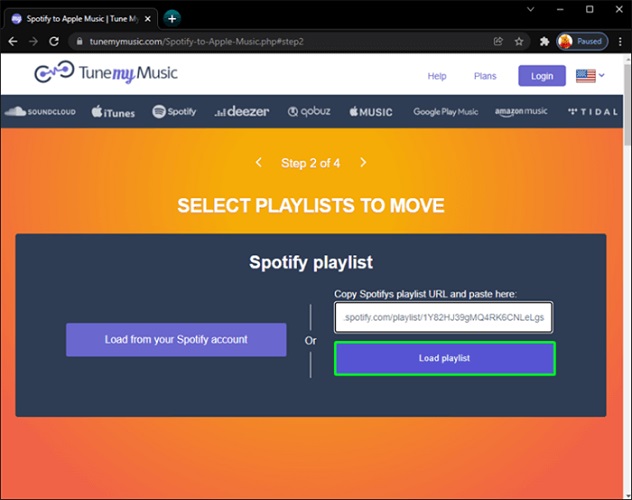
If you want a software-free way to transfer Spotify to Apple Music, TunemyMusic can be a reliable option. TunemyMusic is designed with a simple and user-friendly UI to help you quickly transfer playlists from Spotify to Apple Music within just several clicks. You can also choose some single songs to transfer independently but not move a whole Spotify playlist as you need. Now, check the correct way to transfer Spotify playlists to Apple Music online with TunemyMusic.
STEP 1. Open a web browser and then go to the official website of TunemyMusic. Click the “Let’s Start” button to start transferring Spotify to Apple Music immediately.
STEP 2. From all provided music streaming platforms, choose Spotify and sign in with your Spotify account. Then you can choose your favorite Spotify playlists. You can also copy and paste the Spotify playlist URL to select.
STEP 3. Click “Next: Select Destination” to continue. Now, choose Apple Music as the platform you need to transfer Spotify playlists to.
STEP 4. You also need to sign in to your Apple ID. There will be a “Start Moving My Music” button provided. Click it and TunemyMusic will immediately begin to transfer Spotify to Apple Music for you.
FAQs About Transferring from Spotify to Apple Music
How to transfer Spotify playlists to Apple Music for free?
Actually, SongShift, FreeYourMusic, and TunemyMusic are free to transfer from Spotify to Apple Music. But there will be some limitations in use. For example, some of them limit the number and size of Spotify playlists you can transfer. And due to differences in copyright, you cannot fully sync songs on these two platforms. In this case, to transfer a complete Spotify playlist to Apple Music, MuConvert Spotify Music Converter should be the best tool working to help.
Is it possible to transfer Spotify to platforms other than Apple Music?
Yes, it is possible. All transferring tools recommended in this post are available to transfer music among tens of popular music platforms. Like MuConvert Spotify Music Converter, by downloading Spotify playlists locally, you are free to transfer them to all platforms for playing without limitations and song loss.
In Conclusion
If you get tired of using Spotify and want to try Apple Music, you can transfer Spotify to Apple Music with all the mentioned methods in this article. Among them, we strongly recommend MuConvert Spotify Music Converter because it can sync Spotify playlists to Apple Music without missing any songs. So why not give it a shot and have a good try!
Convert Spotify Music to MP3 in 320kbps
Drag and drop to convert Spotify songs, albums, playlists, and podcasts to MP3 easily.
More Posts
13 Best Spotify to MP3 Converter in 2026 (Free & Fast Options Reviewed) Read More » 2026 Best Simple and FREE Tools to Convert Spotify to MP3 Read More » How to Download Spotify Songs for Free [2025] Read More »