If you’re a music lover who uses GarageBand to create music, you may have wondered how to add Apple Music to GarageBand for your projects. Apple Music boasts a vast collection of over 90 million songs, providing GarageBand users with an extensive library of music for their projects. By importing Apple Music songs to GarageBand, you can easily create remixes, mashups, and unique musical compositions by combining elements from existing songs. This creative freedom allows for innovative experimentation and the development of personal artistic styles. In this blog post, we’ll show you workable solutions to add Apple Music to GarageBand.
Part 1. Can You Import Songs from Apple Music to GarageBand?
No. Unfortunately, you cannot directly import songs from Apple Music to GarageBand. Although you can import songs to GarageBand with some limitations, you can only import songs that are stored locally on your device, and they must be unprotected. This means that you cannot import songs that you have purchased from the iTunes Store or Apple Music or songs that have been added to your library from Apple Music. This is because Apple Music songs are protected by DRM (Digital Rights Management), which prevents them from being copied or used in other applications.
To add Apple Music songs to GarageBand, you can make use of a third-party Apple Music DRM removal tool like MuConvert Apple Music Converter to download DRM-free Apple Music songs on Mac first, and then add them later.
Part 2. How to Convert Apple Music to GarageBand
Due to DRM restrictions, Apple Music songs can not be directly imported into GarageBand. To overcome this limitation, you can use third-party software to convert Apple Music songs to a compatible format like MP3. Here, we will walk you through the process of importing Apple Music songs to GarageBand using a tool called MuConvert Apple Music Converter.
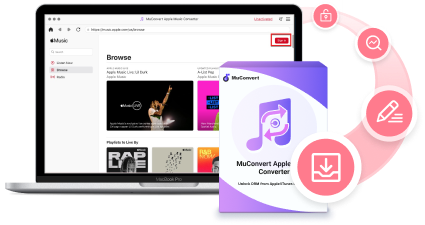
MuConvert Apple Music Converter is a powerful software designed for both Windows and Mac operating systems. It empowers you to remove DRM protection and seamlessly convert Apple Music songs into various non-DRM audio formats, including MP3, M4A, FLAC, and WAV. By effortlessly keeping the original quality, MuConvert grants you the freedom to enjoy your Apple Music library offline with high quality, transfer your favorite tracks to any device, and incorporate them into your music creation projects with software like GarageBand.
Key Features of MuConvert Apple Music Converter:
- Offer a built-in web player. MuConvert Apple Music Converter comes with an official Apple Music web player without the requirement of the Apple Music app or iTunes installation.
- Ensure high-quality conversion. This program converts Apple Music songs to various popular audio formats like MP3, M4A, WAV, and FLAC while maintaining the original quality to ensure the best playback experience.
- Support batch conversion at a fast speed. It employs advanced technology to convert multiple Apple Music songs simultaneously at up to 10X speed, saving time and effort.
- Preserve ID3 tags. This Apple Music Converter retains and edits ID3 tags, such as song title, artist, and album information, for organized playback.
- Provide a user-friendly interface. It features a simple and intuitive interface that makes it easy for anyone to use.
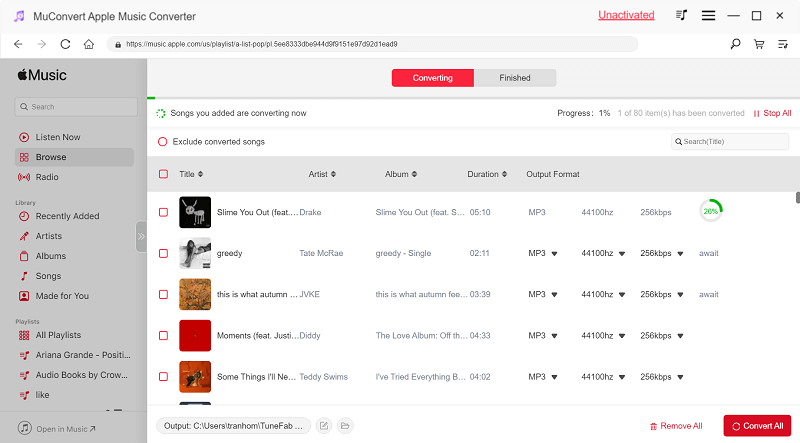
Steps to Convert Apple Music Songs as MP3 for GarageBand
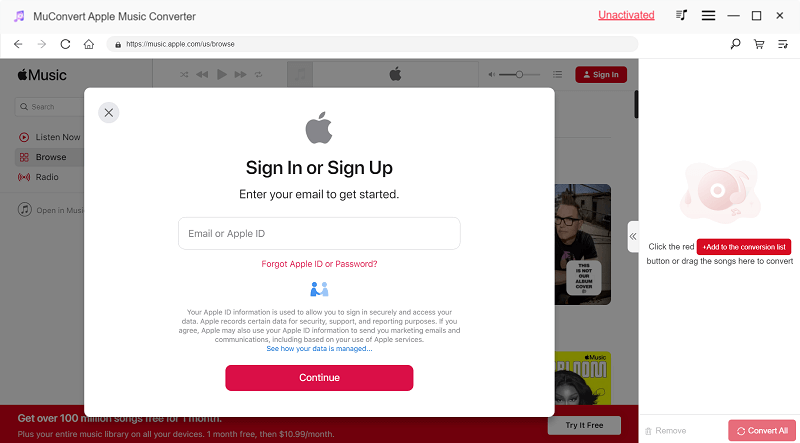
STEP 1. Sign In Apple Music Web Player
After the installation is complete, launch the MuConvert Apple Music Converter on your computer. Then, enter your Apple Music account credentials to sign in. Otherwise, you can not access your Apple Music library on this program.
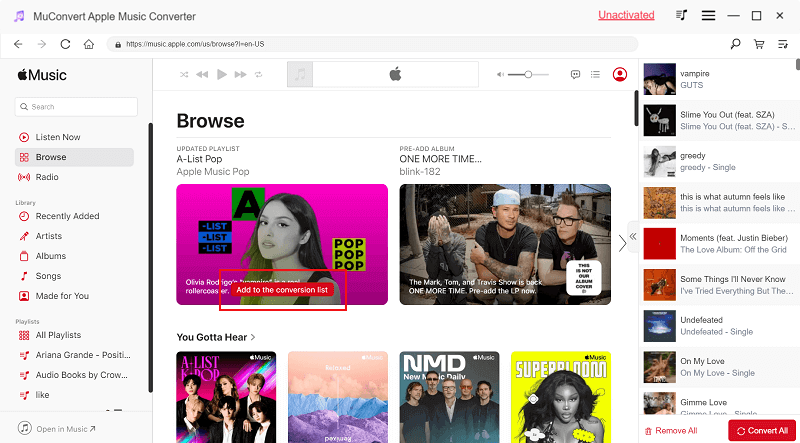
STEP 2. Add Songs from Apple Music to Convert
You can browse through your Apple Music library and select the songs you want to convert to GarageBand-compatible formats. Navigate to the song, playlist, or album from Apple Music you want to convert and drag it to the “+” button to add to the converting list.
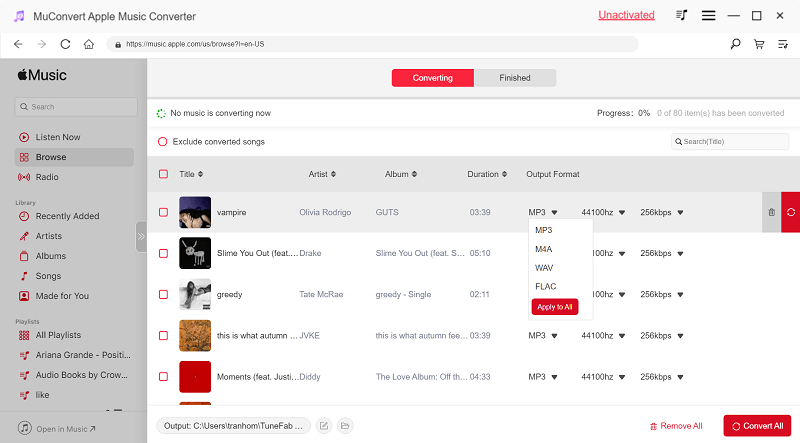
STEP 3. Select Output Format
Garageband supports multiple formats, such as AIFF, CAF, WAV, AAC (except protected AAC files), Apple Lossless, and MP3. We recommend converting the songs to a more compatible MP3 format for easier offline listening and importing into GarageBand or other music creation software.
Click on the “Convert all files to” menu and select “MP3” as the output format.
STEP 4. Start Converting Apple Music to MP3
Click the “Convert” button in the bottom right corner of the MuConvert window. Then, the MuConvert Apple Music Converter will start converting the selected Apple Music songs to MP3.
Once the conversion process is complete, you can import them into GarageBand for editing. You can also freely play Apple Music songs on iPod, iPhone, and iPad offline after synchronization.
Part 3. How to Add Music from Apple Music to GarageBand on Mac
After the conversion, it is time to add converted Apple Music songs to GarageBand on Mac. In this guide, we’ll delve into the seamless process of adding songs to GarageBand on Mac, enabling you to expand your musical horizons and unleash your creativity.
STEP 1. Open the GarageBand application on your Mac.
STEP 2. If you’re starting a new project, click the “Create” button and select the desired project type. If you’re working on an existing project, open it from your file system.
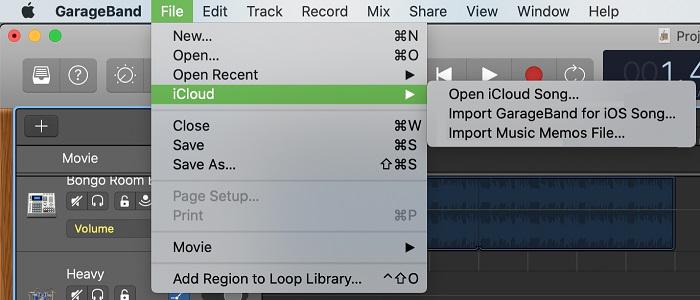
STEP 3. There are two main methods to import a song into GarageBand:
- Drag and Drop: Locate the song file on your computer using Finder or another file management tool. Drag and drop the song file directly onto an audio track in GarageBand’s Tracks area.
- Import from File Menu: Click the “File” menu in GarageBand’s top menu bar and select “iCloud” > “Open iCloud Song..“. Choose the song file from your computer and click “Open.”
STEP 4. Once the song is imported, you can position it within the project by dragging the song’s region along the timeline. Moreover, you can make adjustments to the song’s volume, panning, effects, and other parameters using the editing tools and controls in GarageBand.
Part 4. How to Import Songs from Apple Music into GarageBand on iPhone/iPad
If you’re an iPhone or iPad user, you might also wonder how to add Apple Music to GarageBand on your device. This guide will walk you through the process of seamlessly importing songs from Apple Music into GarageBand on your iPhone or iPad, allowing you to enjoy your favorite tunes offline.
STEP 1. Sync converted Apple Music songs to iTunes. Click “File” on the Menu bar, and then, select “Add Library” to import wanted songs.
STEP 2. Open GarageBand on your iPhone/iPad and create a new project or open an existing project.
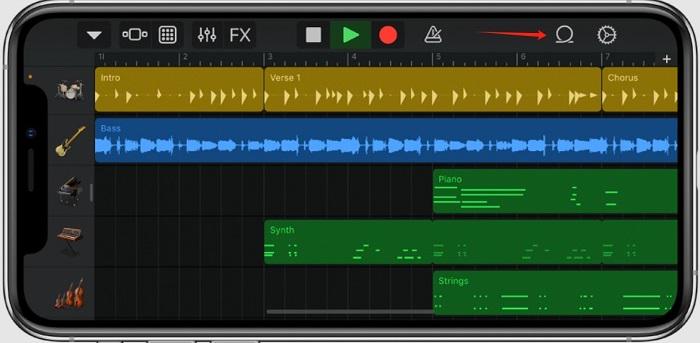
STEP 3. Tap on the “Tracks” button to display a list of tracks. Hit the “Loop Browser” button in the control bar, displaying a variety of loops and sounds. Then, click the “Music” tab to move on.
STEP 4. Use the search bar to find the song you want to add. You can also browse by artist, album, genre, or playlist. Once you’ve found the song, import it into the Tracks area. The song will be added to your project as an audio track.
FAQs on Adding Apple Music to GarageBand
Why Can’t I Use Apple Music Songs on GarageBand?
The primary reason why you can’t directly use Apple Music songs on GarageBand is due to DRM protection that prevents you from copying or modifying Apple Music songs, which includes using them in GarageBand.
To work around these restrictions, you can either purchase the songs DRM-free or use a tool like MuConvert Apple Music Converter to convert Apple Music to a compatible format like MP3. Once you have the songs in a non-DRM format, you can import them into GarageBand for editing and manipulation.
How to Add GarageBand Song to Apple Music?
Fortunately, there is a straightforward way to share a GarageBand song to the Music app, add it to a playlist, or sync it to an iPhone or iPad. To share a song from GarageBand to the Music app on your Mac, follow these steps:
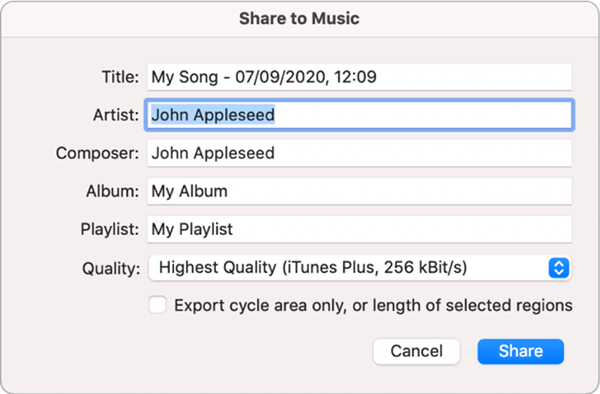
STEP 1. Open the GarageBand project containing the song you want to share. And, click the “Share” button.
STEP 2. Select “Song to Music” from the drop-down menu. Then, you can customize the sharing song information, including Title, Artist, Composer, Album, Quality, etc. By default, the entire song can be shared, but you can check “Export cycle area only, or length of selected regions” to share with the wanted area.
STEP 3. Click “Share” to export the song to the Music app. Then, you can easily add GarageBand Song to Apple Music.
The song will be added to your Music library and will be available for playback like any other song. You can also add the song to playlists, create smart playlists based on specific criteria, and access the song across your Apple devices.
Conclusion
After reading this article, we believe that how to add Apple Music to Garageband is no longer a big challenge for you. Although Apple Music songs cannot be added to Garageband directly, you can use DRM Removal tools like MuConvert Apple Music Converter to convert the songs from Apple Music to MP3 before adding them. Once you have added your Apple Music songs to GarageBand, you can start creating your own music. So get started today and see what you can create! Also, don’t forget to share this article to let more people get help if you find it helpful.
Convert Apple Music to MP3 Losslessly
Remove DRM from Apple Music songs and convert them to MP3 without quality loss.
More Posts
8 Best Apple Music Converter Detailed Review [App/Online] Read More » How to Remove DRM from Apple Music [New Updated!] Read More » How to Convert Apple Music to MP3 [2026 Updated] Read More » How to Convert M4P to WAV Lossless in 2025 [4 Ways] Read More »