Why can’t I add Apple Music to PowerPoint? In fact, Apple Music and iTunes have encrypted the downloaded songs in protected M4P, which is not compatible with PowerPoint. Therefore, you’ll need to convert Apple Music to compatible DRM-free formats like MP3 first. If you have no idea, the post will show you how to add Apple Music to the PowerPoint slideshow with step-by-step guides. Keep reading and set the tone to make your presentation fabulous.
2 Easy Steps to Set Favorite Apple Music Songs as Android Ringtones
How to Set Apple Music as Alarm on iPhone & Android to Wake Up

Why Can’t You Directly Add Apple Music to Powerpoint
As mentioned before, Apple Music encrypts its music with M4P, an audio format with DRM, preventing users from editing or using the songs on third-party apps. It’s not a surprise that M4P songs are not recognizable with PowerPoint.
PowerPoint supports certain audio formats including MP3, WAV, WMA (Windows Media Audio), AU (UX Audio), MID, MIDI, and AIFF (Audio Interchange File Format). It also supports DRM-free M4A songs purchased from iTunes. Only by encoded in such formats can the song be added to PowerPoint.
In a word, to add a song from Apple Music to your ppt, you need to first remove the DRM from the song and convert it to compatible formats instead of M4P.
How to Download and Add Apple Music to PowerPoint
Let’s break down the method into 2 parts. To begin with, you need to download Apple Music on Mac or Windows. Then, add music to the PowerPoint slideshow. This needs the help of a professional music downloader designed with features for DRM removal and format conversion.
Download Apple Music to MP3 for PowerPoint
MuConvert Apple Music Converter is an incredible Apple Music downloader that enables you to directly strip off DRM protection and download Apple Music to MP3 or lossless WAV, which are supported by PowerPoint. It comes with an in-built web player that lets you search, download, and enjoy songs all in one place. What’s better, it can keep the best listening with up to lossless audio quality at 320kbps and 48kHz. Without launching iTunes/Apple Music, it takes one button to get it all done, making it more convenient to insert music into PowerPoint.
● Fast convert encrypted Apple Music to MP3, M4A, and WAV formats supported in PowerPoint.
● Batch download Apple songs, albums, and playlists with simple clicks.
● Boost the download speed up to 20X faster than ever.
● Cover all music library including songs, albums, playlists, podcasts, etc., letting you add any song to slides.
● Keep song info for easy music management for those who want to insert multiple songs into PowerPoint.
● Allow customization of output settings to your preference.
Now, let’s learn how to convert Apple Music to DRM-free MP3/WAV/M4A before you add music to PowerPoint slideshow. It cannot be easier with MuConvert Apple Music Converter.
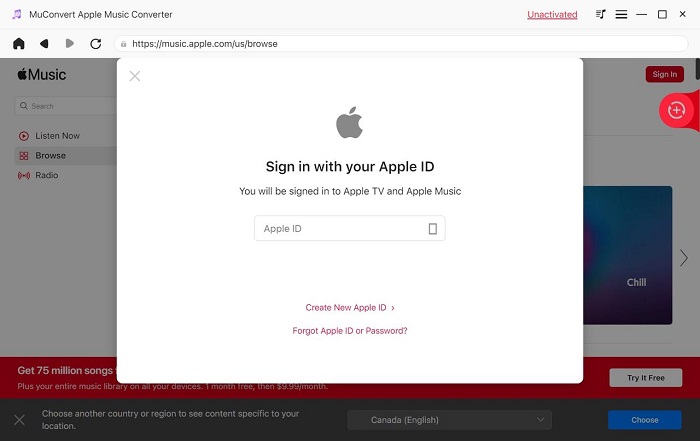
STEP 1. Launch this Apple Music converter after you download and install the software. Sign in to your Apple ID to access Apple Music’s music library.
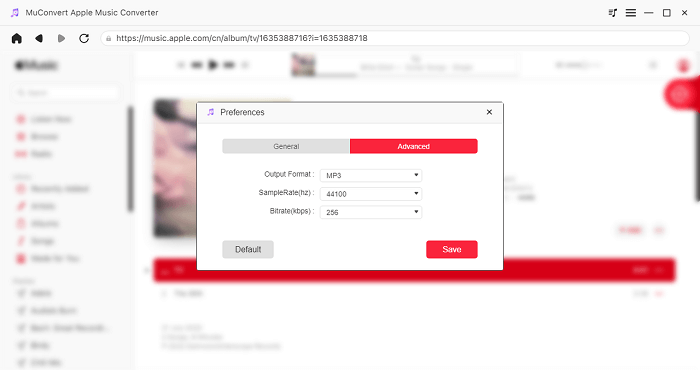
STEP 2. Click “≡” and change the output format (MP3/WAV/M4A), bitrate, sample rate, and location.
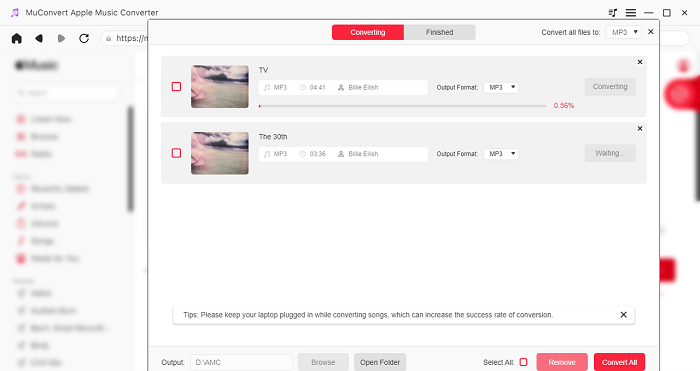
STEP 3. Drag a single song or the cover of an album/playlist to the “Convert” button to fetch data.
STEP 4. Choose music for PowerPoint Presentation and click “Convert All” to get your favorite songs.
Add Music to Powerpoint Slideshow from Apple Music
Now, you already have Apple Music M4A/M4P songs converted to compatible format for PowerPoint with the M4P to MP3 converter. Next, let’s check out this quick guide on how to add music to PowerPoint on Mac/Windows.
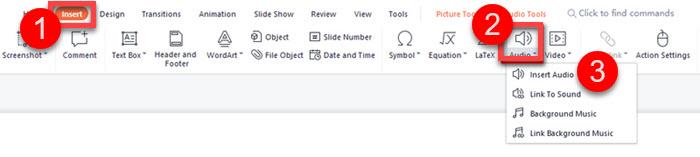
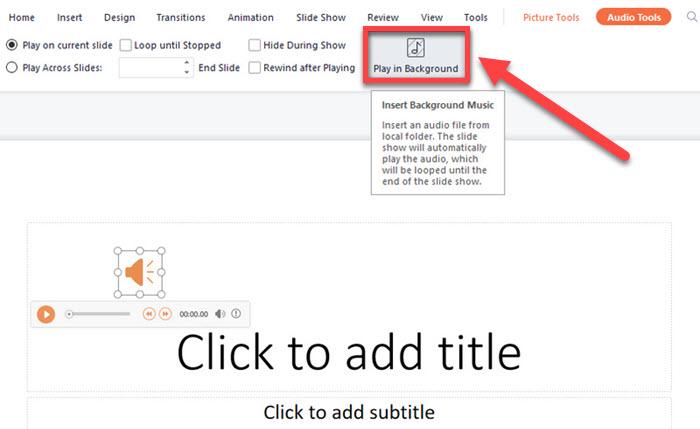
STEP 1. Open the PowerPoint app and select “Insert” > “Audio” > “Insert Audio”.
STEP 2. Find the Apple Music song you’ve converted just now, and add song to PowerPoint slideshow.
STEP 3. Then, you can edit the audio, adjust the audio volume, and customize the audio playing styles in the “Audio Tools” section.
STEP 4. Also, select “Play in Background” to create a more engaging and interactive presentation.
The tutorial is also applicable to Mac if you wonder how to add music to PowerPoint on Mac.
How to Record and Add Music to PowerPoint from Apple Music
Many may not be aware that PowerPoint actually has a default recording capability. It allows you to record audio and insert music into PowerPoint presentations. In this case, you can directly use this feature to record the desired Apple Music and add music to PowerPoint.
However, since PowerPoint only records audio from your microphone, the music quality will be thus not as good as expected. If you want to enjoy the best playback experience, MuConvert Apple Music Converter is an optimal tool to help you download high-quality songs in batches without DRM protections. Just give it a go and you’ll be into it.
If you just want to add music or other audio clips to your slide show, here’s how to add Apple Music to PowerPoint by recording.
STEP 1. Open and update the PowerPoint app to the latest version.
STEP 2. Click “Insert” “Audio”, and select the “Record Audio” function.
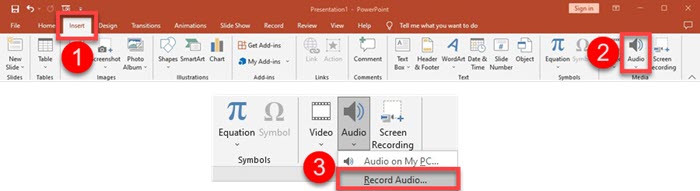
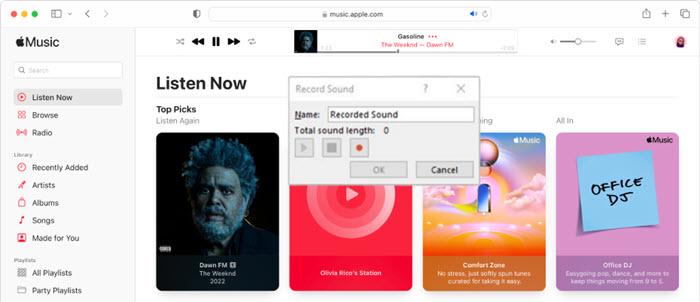
STEP 3. After a small window pops up, open Apple Music and play a song.
STEP 4. Click the “Record” button to record the song and hit the “Stop” button when it ends.
STEP 5. Now, click “OK” and embed music in PowerPoint slideshow.
FAQs About How to Add Apple Music to PowerPoint
Why Can’t I Record Audio on PowerPoint Mac?
If you are having trouble recording audio on PowerPoint for Mac, there could be a few reasons why:
- Make sure that PowerPoint has access to your microphone. Please go to “System Preferences” > “Security & Privacy” > “Privacy” > “Microphone“, and make sure that PowerPoint is selected.
- Check your audio settings in PowerPoint to make sure that the correct microphone is selected.
- You are using an older version of PowerPoint, so please upgrade to the latest version.
- The PowerPoint app may break down temporarily, and you can try it later.
How to Add and Continuously Play Apple Music Across All Slides
Adding an Apple Music song to a single slide is not enough? If you would like to make a song last through more than one slide, here’s how to play Apple Music across all slides.
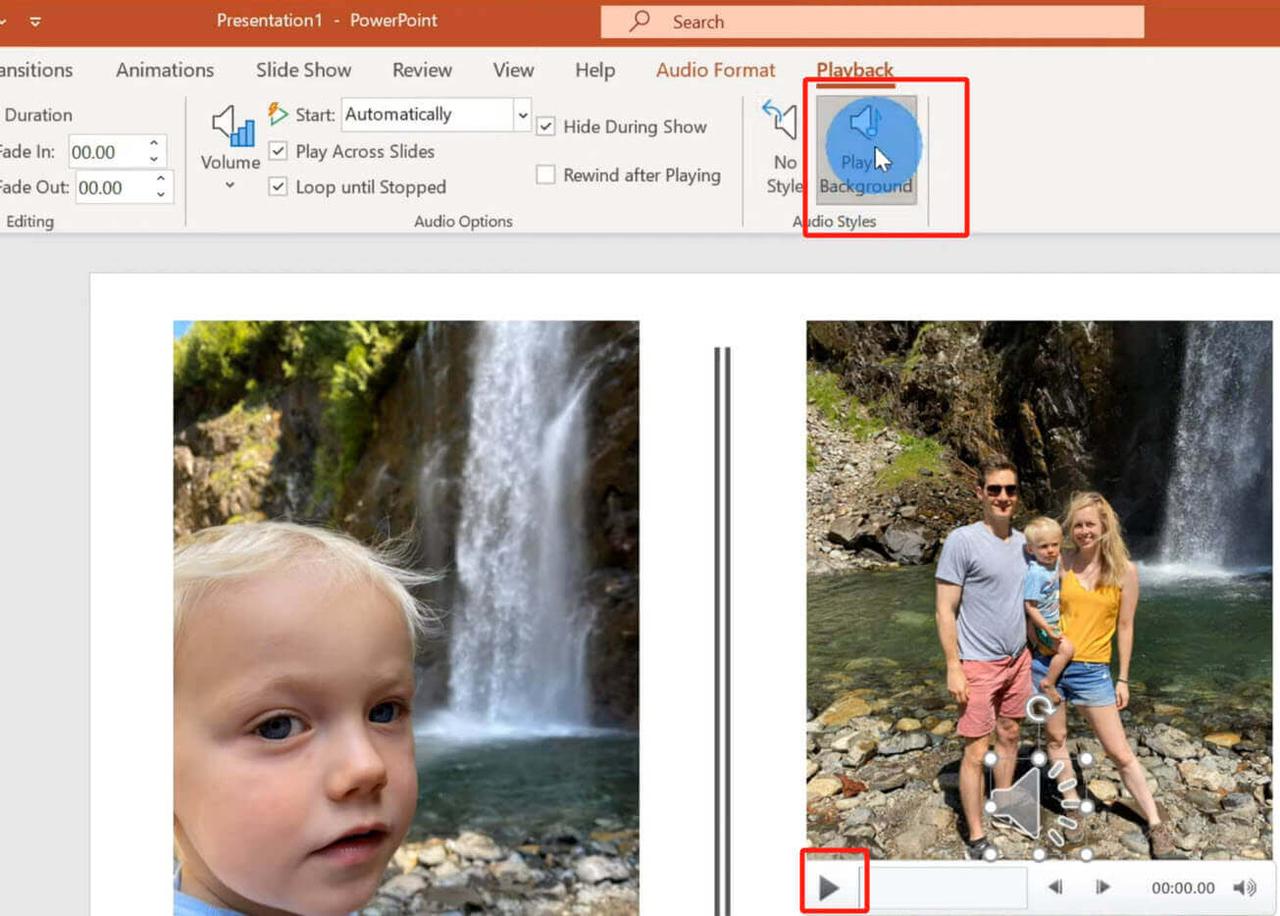
Step 1. Insert the track. Click “Insert” > “Audio” > “Audio on My PC“. Select the song you want to play and click “Insert“.
Step 2. Click the audio icon on the slide. Two additional options (Audio Format and Playback) will appear at the top of the PowerPoint interface.
Step 3. Go to the “Playback” tab. You can also trim audio, adjust the volume or add effects. Then, click “Play in the Background“. Then, “Playback Across Slides” and “Start Automatically” are all checked by default.
Conclusion
Getting Apple Music play on Powerpoint is not complex. All you need to do is remove DRM and convert the song to audio formats supported by Powerpoint with MuConvert Apple Music Converter. The music converter handles DRM and converts formats at 20X speed while preserving original quality. Download the app to add music to PowerPoint and make your presentation more engaging right now!
Convert Apple Music to MP3 Losslessly
Remove DRM from Apple Music songs and convert them to MP3 without quality loss.

More Posts
8 Best Apple Music Converter Detailed Review [App/Online] Read More » How to Remove DRM from Apple Music [New Updated!] Read More » How to Convert Apple Music to MP3 [2026 Updated] Read More » How to Convert M4P to WAV Lossless in 2025 [4 Ways] Read More »