Apple Music has provided a wonderful streaming platform. As long as you subscribe to the Apple Music Plan, you can directly visit the Apple Music Library for online listening on any of your Apple devices, such as the iPhone.
But sometimes you may find that downloading Apple Music to iPhone for offline listening will be a better option, because not every place has a good Internet or Wi-Fi connection to get online sources. Additionally, you need to keep an eye on your Apple Music Plan subscription and renew it every month, since once it expires, all the online music in your Library will no longer be available to listen to.
The downloaded Apple Music songs not only have no loss of sound quality, but also set you free to listen to Apple Music anytime without hassle. This post will show you some quick and easy ways to download music from Apple Music to iPhone in detail, and even provide an extra way to save your Apple Music Library for local backup. Keep reading and get started!
Part 1: How to Download All Songs on iPhone
Apple Music offers official functions for you to download all songs from Apple Music to iPhone and enjoy the playback offline. With its help, you won’t have to search for each song to listen to online. Instead, you can download all the songs added to the Library and listen to them all at once. This feature is easy to get started with, as long as you install the Apple Music app on any of your Apple devices. However, there won’t be a download option provided unless you have activated the Apple Music Membership.
Here are the steps for you to download all songs from Apple Music to iPhone.
Add Apple Music to Library
Step 1: Run the Apple Music app on your device, and sign in with your Apple ID with the Apple Music Plan subscription.
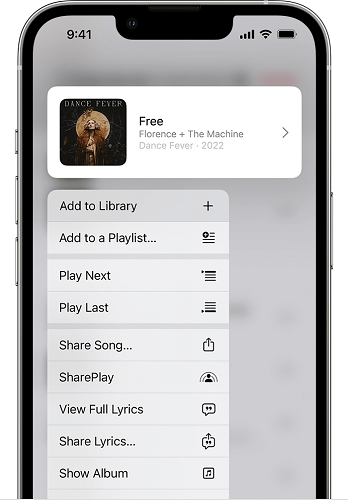
Step 2: Search for your favorite songs/albums/playlists, touch and hold them to “Add to Library“.
Download Apple Music to iPhone
Step 1: After finishing adding Apple Music, you can locate the songs you want in your Library.
Step 2: Touch and hold the songs/albums/playlists you want, then tap “Download”.
Before adding music and downloading them, please make sure that you have subscribed to the Apple Music Plan but not the Apple Music Voice Plan, or you may not enjoy all the features.
Part 2: How to Download Songs on Apple Music as Local MP3 Files
The official method of downloading Apple Music to iPhone is easy to handle, but it still has many restrictions. For example, you need to keep the Apple Music app on your devices, because the downloaded files are in specially DRM-protected formats, which can only be played on its own platform. Besides, you also need to keep your Apple Music subscription working, since all the songs, even those downloaded ones, will become unavailable once your Membership expires.
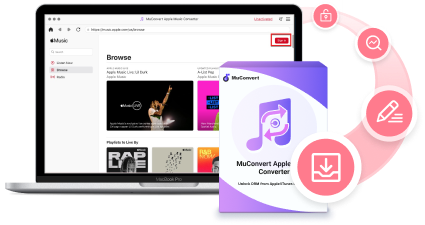
To release the storage on your phone and make downloaded Apple Music easier to listen to, a professional Apple Music Downloader will be the most convenient tool. That’s why MuConvert Apple Music Converter is strongly recommended.
With its built-in Apple Music Web Player, MuConvert Apple Music Converter allows you to directly sign in to your Apple ID and access the original Apple Music Library to start your work without the Apple Music app. The downloaded Apple Music songs will be saved in common formats such as MP3 without DRM restrictions, and can be supported on different devices. After that, you can transfer the downloaded Apple Music to iPhone and then use any media player you have installed to play the music offline.
- Fast Downloading Speed: Provides up to 20X faster to download all Apple Music songs offline at once without wasting time.
- Multiple Output Formats: Offers common formats including MP3, M4A, WAV, and FLAC to download Apple Music songs for playback on any device.
- Better Listening Experience: Keeps the original Apple Music quality for you to play them offline with the same experience.
- User-friendly Functions: Saves the ID3 and metadata info for all Apple Music songs to help the music management offline to be more convenient.
Download Apple Music to MP3
Follow the steps below to start your work. Please make sure that you have an Apple ID with an Apple Music subscription in advance.
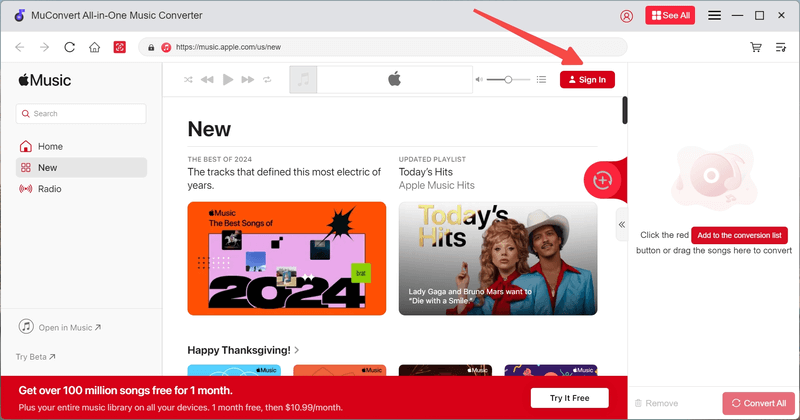
Step 1. Launch MuConvert Apple Music Converter and Log in
Once MuConvert Apple Music Converter is installed on your computer, open it and enter the home screen of the built-in Apple Music Web Player. By pressing the “Sign in” button on the top-right corner, you then need to sign in using your Apple account. Otherwise, you can’t search for songs or download them in the software.
Step 2. Add Apple Music Songs to Download
After signing into the account, you can begin to search for all the songs or playlists you want to download to iPhone at once. When you find them, directly drag and drop into the conversion list and MuConvert Apple Music Converter will analyze them for you.

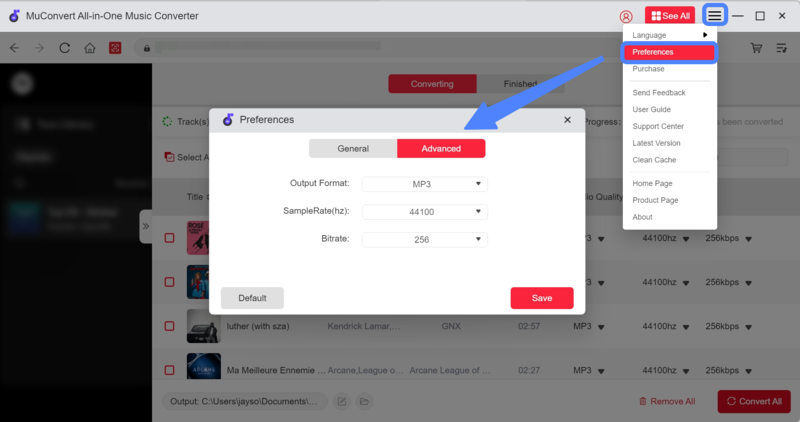
Step 3. Choose Format and Quality to Download
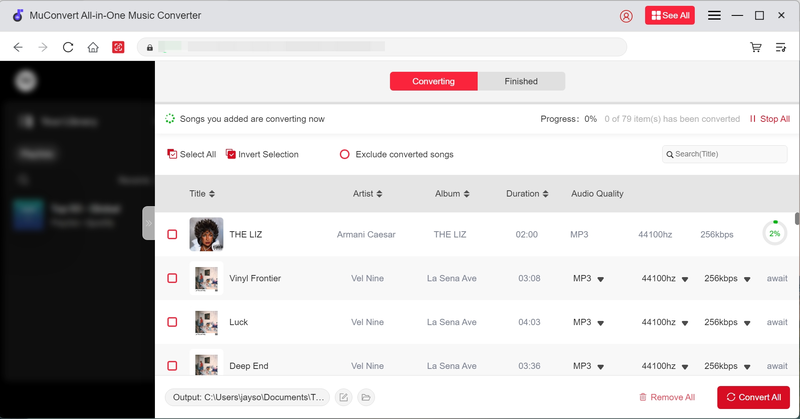
After the Apple Music songs are selected, you can directly choose the output format, SampleRate, Bitrate in the conversion interface.
Step 4. Start Downloading All Apple Music Songs
Now, after all the settings are made, click the “Convert All” button and MuConvert Apple Music Converter will quickly download all songs from Apple Music for you at once.
Transfer Music from Computer to iPhone
Once you finish downloading the converted Apple Music songs to your computer, you can transfer those MP3s to iPhone for free playback. AirDrop and iTunes are 2 tools suggested for transferring songs from Apple Music to iPhone. AirDrop can be used to transfer files directly between Apple devices, such as Mac computers and iPhones. iTunes is a media transmission platform mainly used on Windows computers, and the procedure will be a little bit more complicated.
The following are detailed steps of the 2 methods to transfer Apple Music from computer to iPhone. Choose the one that suits you and get things done!
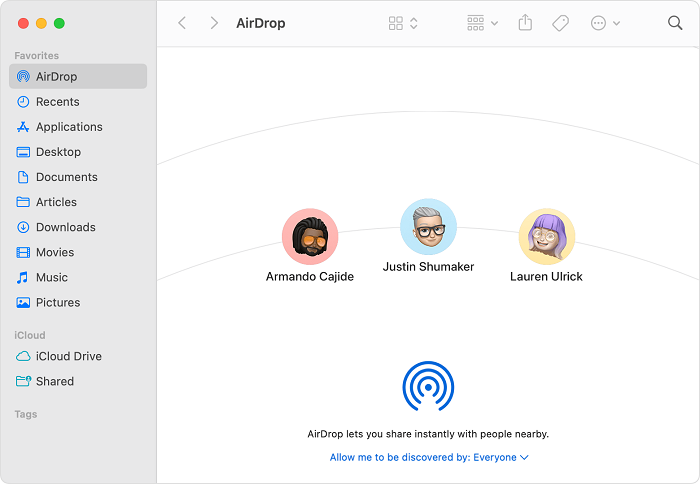
Method 1: Using AirDrop on Mac
Step 1: Launch the AirDrop function from “Finder” and turn the feature on. At the same time, bring your iPhone nearby and enter “Settings” to enable AirDrop. You can also go to the “Control Center” to turn on the AirDrop feature.
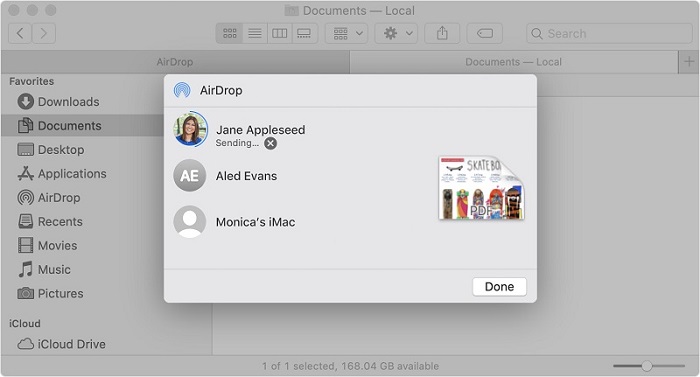
Step 2: Locate the selected MP3s, and drag them to the “AirDrop” tag. Choose your iPhone as the target device, and after the notification pops up on your iPhone, tap “Accept” to get the files.
Method 2: Using iTunes on Windows
Step 1: Launch iTunes on your Windows or Mac computer. Use a USB cable to connect your iPhone to your computer.
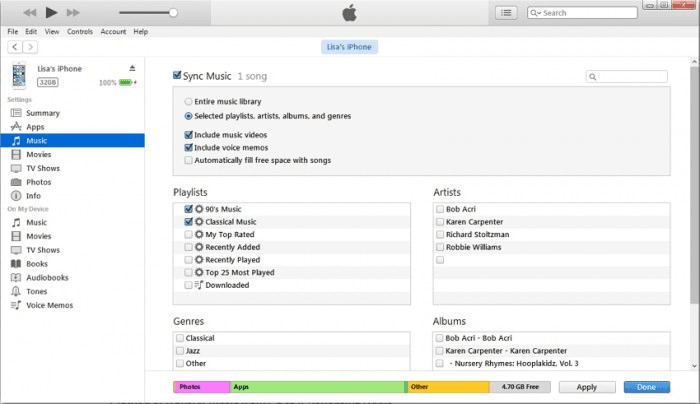
Step 2: Click “Files“, and then “Add File to Library“. Select the files or folders you want to add, and click “Open” to add music files to iTunes Library.

Step 3: Click “Music” on the left, and select MP3 files to “Apply” to send them to iPhone.
FAQs about Downloading Apple Music to iPhone
Q1: How to Download Music on Apple Music for Free?
Before you spend money on subscribing or renewing the Apple Music Plan, you can try to consider other ways to enjoy more convenience for less cost.
If you are new to Apple Music, you don’t need to purchase the Apple Music subscription at once, because for new users of Apple Music, there will be a 1-month trial period, so that you can download and listen to songs online for free, until you decide to pay to renew the subscription.
After your Apple Music subscription ends, you will no longer be able to listen to songs online or listen to the downloaded songs offline. In this case, you can consider using the MuConvert Apple Music Converter to download music from Apple Music to iPhone in MP3 format before your membership expires. After that, you can play the downloaded music on any media player even without a subscription.
Q2: How to Sync Music on iPhone from Computer?
If you subscribe to Apple Music Plan, you can visit and listen to your Music library on any Apple device that has the Apple Music app installed and is signed in with the same Apple ID you used to subscribe to Apple Music. The simple step to achieve the goal is turning on the “Sync Library” function.
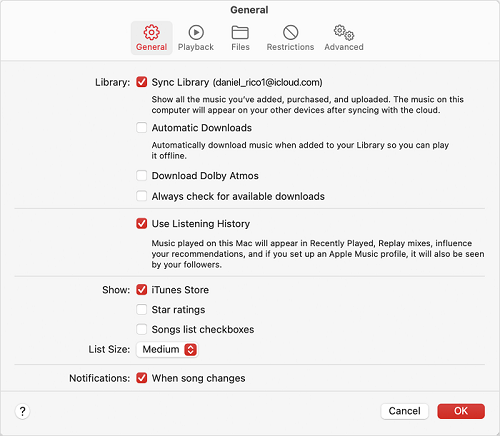
Step 1: Turn on Sync Library on Mac
Run the Apple Music app on your Mac, and choose “File” > “Library” > “Organize Library“. After selecting “Consolidate files“, you can click “Music” > “Settings” to enter the “General” tab, and then select “Sync Library“.
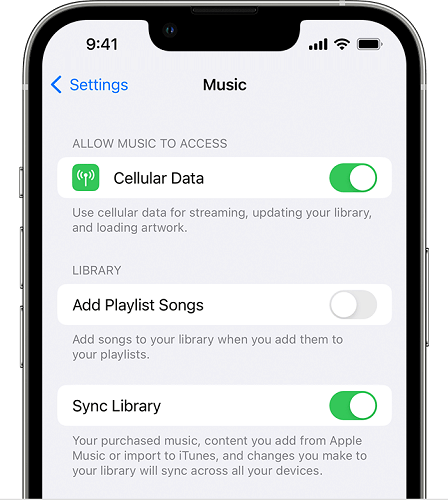
Step 2: Turn on Sync Library on iPhone/iPad/iPod
Make sure that your iPhone/iPad/iPod is signed in with the same Apple ID that you use with your Apple Music subscription. Go to “Settings”, and tap “Music” to turn on “Sync Library“.
Conclusion
Finish reading the article, you have learned 2 solutions to downloading Apple Music to iPhone, including the official way using the Apple Music app and the other way using a third-party tool. We believe that MuConvert Apple Music Converter is the best option, because it can directly access the official Apple Music Web Player and download original Apple Music songs in high quality conveniently. Press the button below to try, and you will not regret it.
Convert Apple Music to MP3 Losslessly
Remove DRM from Apple Music songs and convert them to MP3 without quality loss.
More Posts
8 Best Apple Music Converter Detailed Review [App/Online] Read More » How to Remove DRM from Apple Music [New Updated!] Read More » How to Convert Apple Music to MP3 [2026 Updated] Read More » How to Convert M4P to WAV Lossless in 2025 [4 Ways] Read More »