How to Cancel Your Amazon Music Subscription?
- April 5, 2023
- Richard
You may have subscribed to Amazon Music but want to cancel it now as many free music streaming services are available online. This post will show you some easy ways to get this task done on a phone and computer. However, once you cancel the Amazon Music Unlimited subscription, you’ll lose access to the offline mode and you can’t listen to Amazon Prime Music offline. Thus, we also bring you a bonus for keeping Amazon Music offline even after a subscription. Please continue reading and check it out!
Cancel Amazon Music on Computer
On Browser
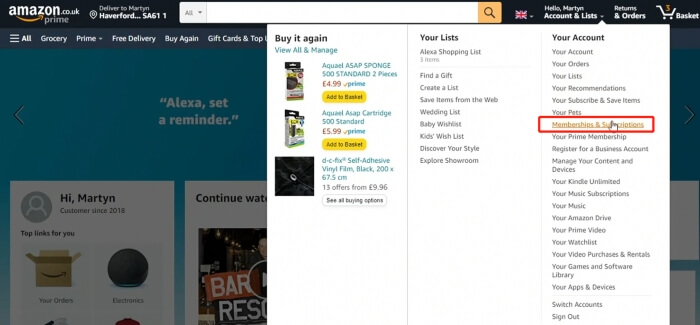
Step 1. Firstly, open the Amazon website on your computer and log into your Amazon account with a subscription plan.
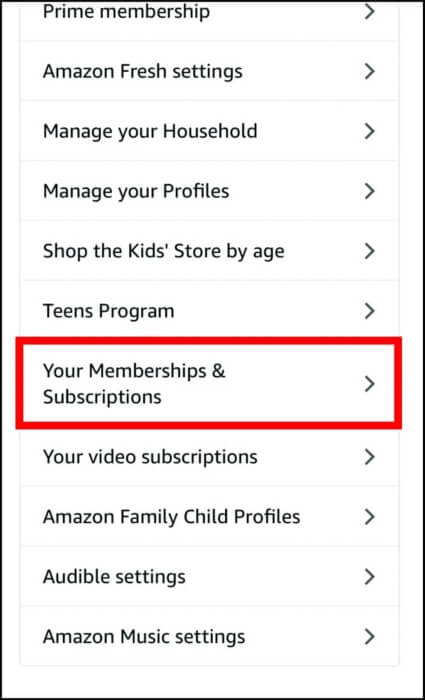
Step 2. Then go to the top right-hand corner and hover your mouse over your name. Hit it and there is a drop-down box. Select “Memberships &Subscriptions” from the list.
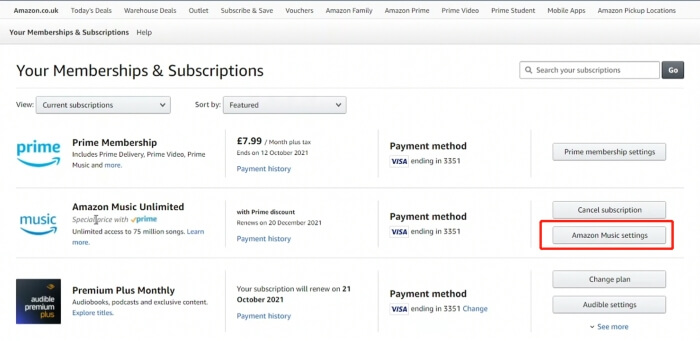
Step 3. Then, navigate to the “Amazon Music Unlimited” and click “Amazon Music settings” next to it.
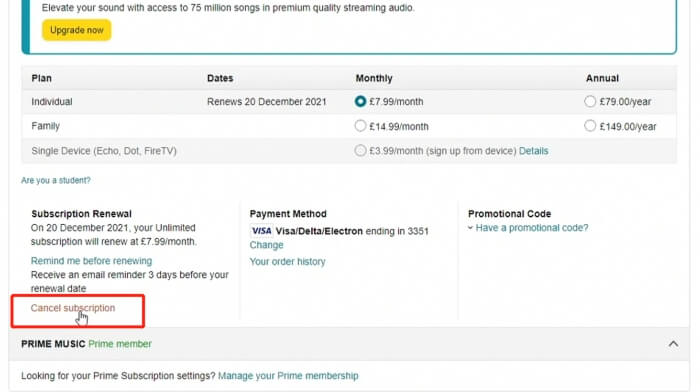
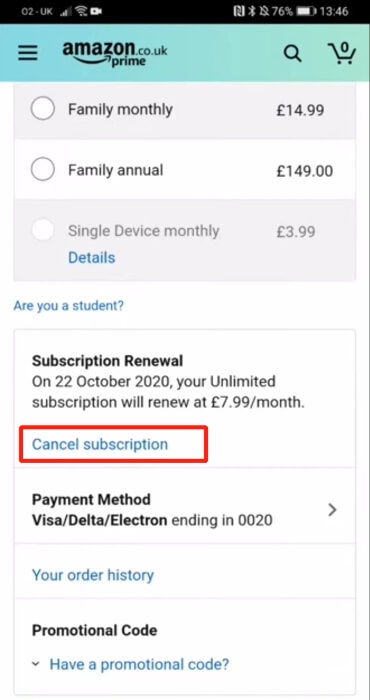
Step 4. On the plan information page, click “Cancel subscription” from the “Subscription Renewal” box.
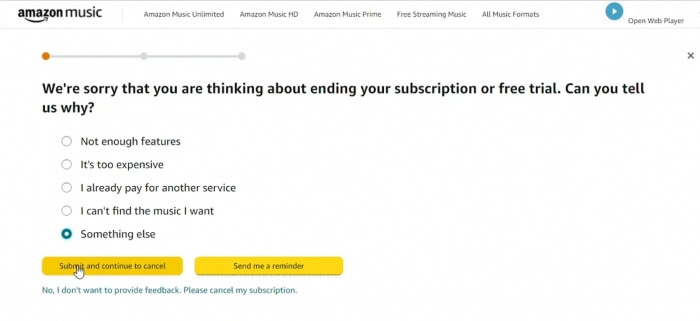
Step 5. Choose a reason for the cancelation and hit “Submit and continue to cancel”. Continue to click “Confirm cancellation” until you see the plan information page again. Now, you cancel the subscription successfully.
On iTunes
If you’ve used iTunes to subscribe to Amazon Music, you can also cancel the subscription on iTunes.
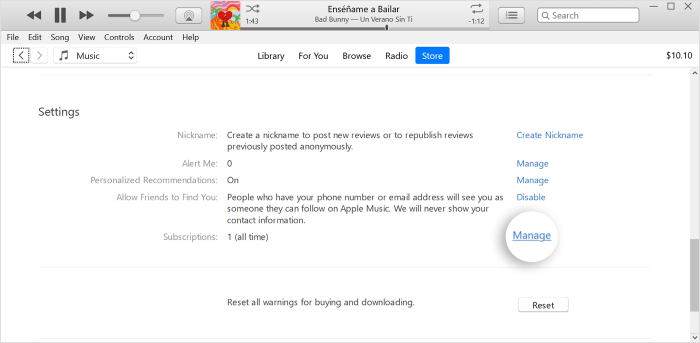
Step 1. Open iTunes on your computer. And hit “Account” from the menu bar and choose “View My Account”.
Step 2. Then scroll down to click “Subscription” in the “Settings” section. Then click the “Manage” button and find the Amazon Music option from the list.
Step 3. Then hit “Edit” and click “Cancel Subscription” on the detail page. Finally, click “Confirm” in the pop-up window
Cancel Amazon Music on Android
If you are using an Android device, follow the steps below.
Step 1. To begin with, open the Amazon Music app.
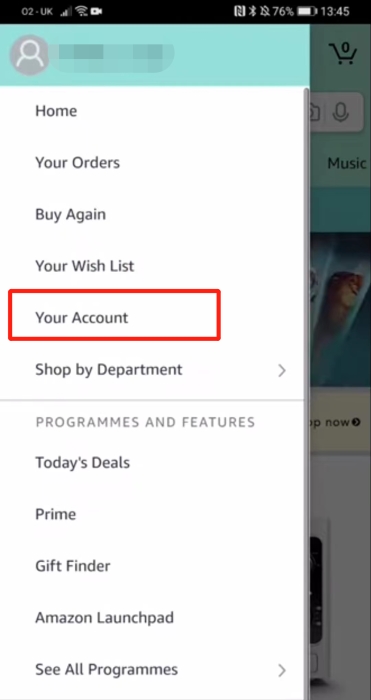
Step 2. Tap the “three-lines” icon on the left side of the screen and tap “Your Account”.
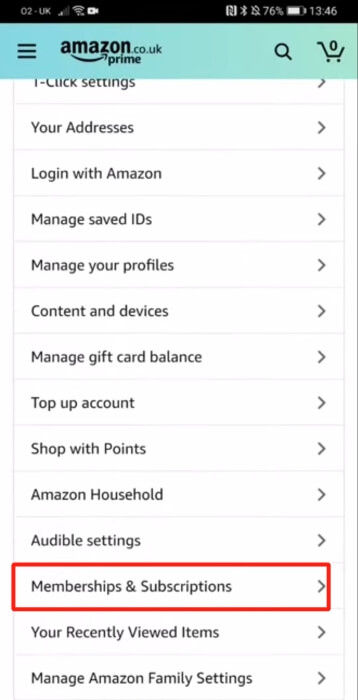
Step 3. Then, scroll down and tap “Membership & Subscriptions” in the “Account Settings” section.
Step 4. Next, hit “Amazon Music Unlimited” and “Amazon Music Unlimited Settings”. Now, you can see a new page with your plan information. Navigate to the “Subscription Renewal” section and tap “Cancel subscription”.
Step 5. Finally, select a reason for canceling and tap “Submit and confirm cancel”.
Cancel Amazon Music on iPhone/iPad
Via Device Settings
Step 1. Open the Settings app on your iOS device.
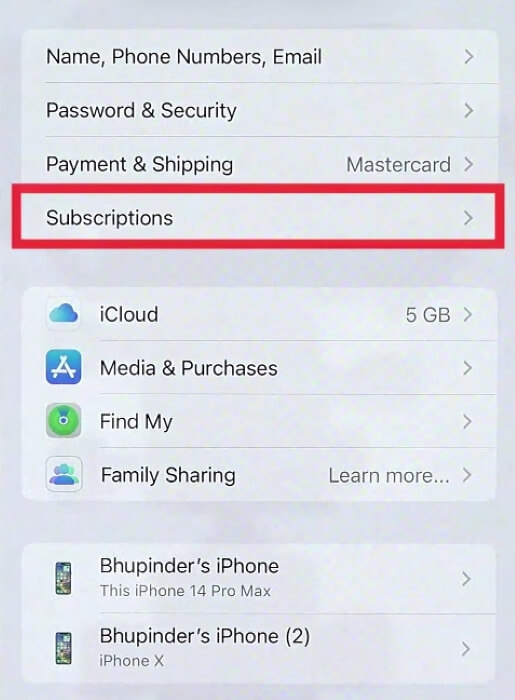
Step 2. Enter “subscriptions” in the search bar at the top of the page. Then it will go to your account settings page. Tap “Subscriptions” and select the “Amazon Music” subscription.
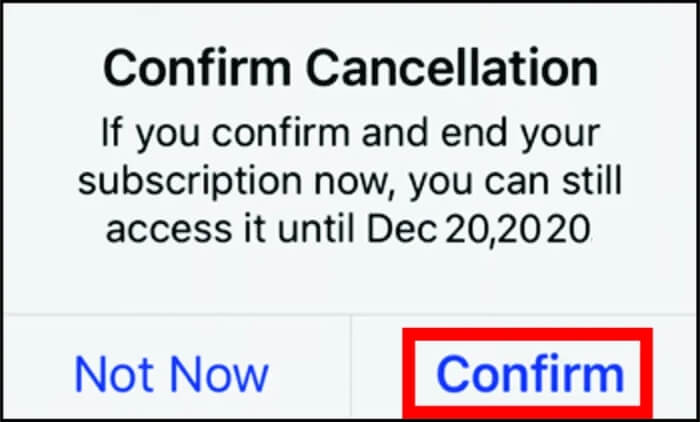
Step 4. Finally, select “Cancel Subscription” and “Confirm” to finish the task.
Via Browser
Aside from the Settings app, you can also cancel Amazon Music via the web browser.
Step 1. Open your safari on your device and go to the Amazon website and hit the “three horizontal lines” icon in the upper-left corner of the screen to sign into your Amazon account.
Step 2. Then go to the “Account settings” section and scroll down to find “Your Membership & Subscriptions”.
Step 4. Navigate to “Amazon Music Unlimited” and tap it. On the plan information page, select “Amazon Music Unlimited Settings” from the “Advanced controls” section.
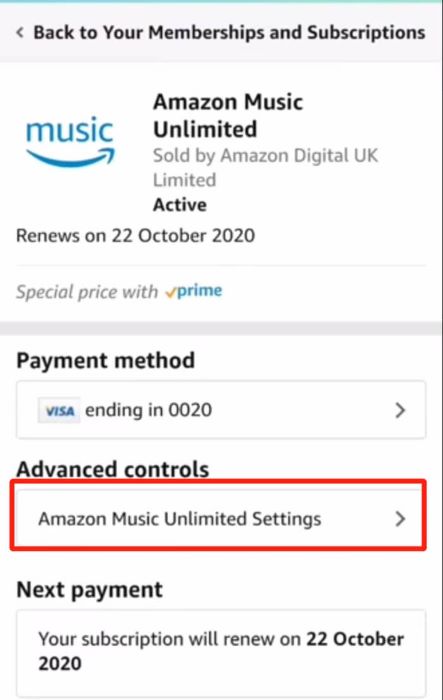
Step 5. Select “Cancel subscription” and submit a reason for the cancellation. Tap “Confirm cancelation” to confirm.
Tip: How to Keep Amazon Music Offline Even After Subscription
We have shown you several ways to cancel your Amazon Music subscription, either from your phone or from your computer. But once you cancel your subscription, you won’t be able to listen to Amazon Prime music offline, although you can still access to some free tracks online. So is there any way for users to listen to the downloaded songs offline even when their subscription has expired? MuConvert Amazon Music Converter can give you the answer.
MuConvert Amazon Music Converter is a reliable and professional tool that can decrypt Amazon Music and convert Amazon songs to MP3, M4A, WAV, and FLAC files. So you can play these audio files outside Amazon Music app flexibly and keep them forever. It can grab all Amazon songs including Amazon Free, Prime, Unlimited, and HD with lossless audio quality.
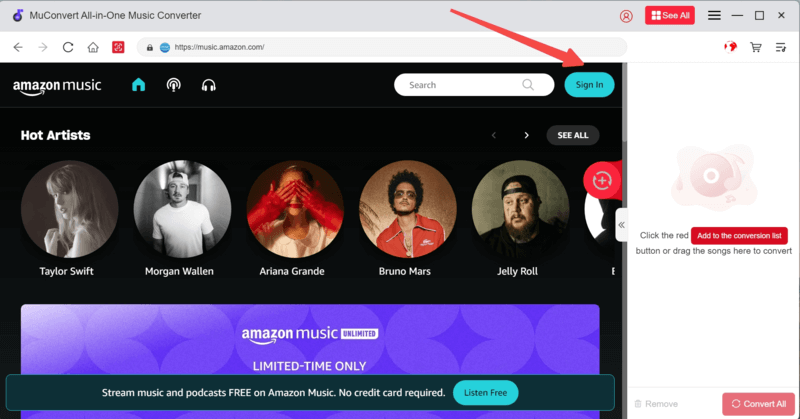
Step 1. Download and run MuConvert Amazon Music Converter
Step 2. Log into your Amazon Music account
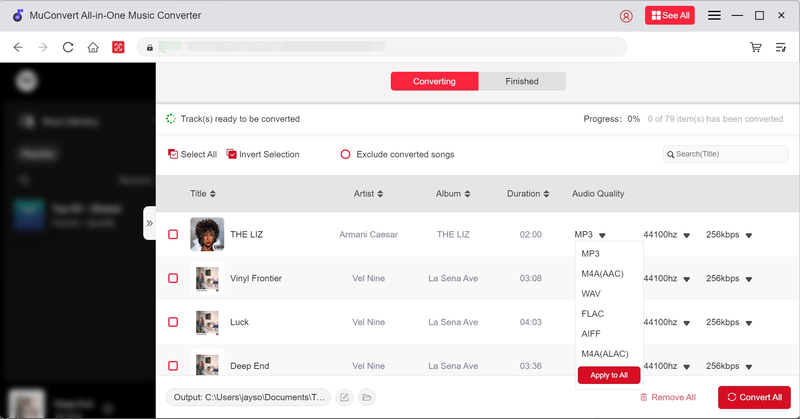
Step 3. Add songs or playlists to the conversion list

Step 4. Customize output format and location
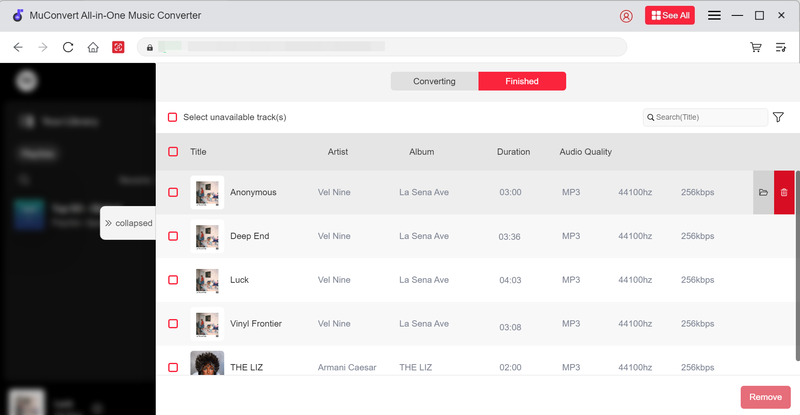
Step 5. Start converting Amazon Music songs.
Conclusion