Are you tired of being constantly bothered by annoying and unskippable commercials while listening to your favorite songs on Spotify? Such an interrupted experience deeply troubles numerous Spotify free users as only premium subscribers have exclusive access to ad-free music. For this, you may consider giving up Spotify.
But wait, there are some workable solutions. Even for a free account, it is possible to block Spotify ads and enjoy an uninterrupted Spotify music experience. The following post will show you convenient and accessible Spotify ad blockers with a step-by-step guide on how to block Spotify ads for free. Let’s get started.
Related Article:How to Get Spotify Premium Cracked on PC/Mac in 2025
Part 1. Block Spotify Ads on Windows/Mac
On your computer, Windows, or Mac, downloading a Spotify desktop app or using Web Player is always a favored way to enjoy your music journey. Removing Spotify ads, however, is only available for the premium version. Not to worry, here is a full guide on getting rid of Spotify ads without a premium subscription with the assistance of two powerful programs.
Block Ads on Spotify with Spotify Music Converter
If you are a Spotify App user, computer-based MuConvert Spotify Music Converter will be your ideal partner. This tool boasts exceptional stability and efficiency, enabling users to download Spotify music for free with their original sound quality. Its embedded Spotify Web Player allows you to directly download Spotify songs without the need for a Premium account. Then you can import these songs to Spotify for a wonderful ad-free music experience.
This versatile tool offers a range of popular encoders, including MP3, M4A, FLAC, WAV, AIFF, AAC, and ALAC, ensuring that the downloaded songs maintain their audio integrity.
- Downloading Spotify for free: With this tool, you are allowed to download Spotify content without a premium plan on your computer and immerse yourself in a world of melodies without any interruption after importing these downloaded tracks to Spotify.
- Built-in Spotify web player: Accessing Spotify’s vast music library has never been easier. Our converter comes equipped with an integrated Spotify Web Player, allowing you to explore and enjoy the extensive collection of songs without installing the Spotify app.
- Preserve ID3 Tags for Hassle-free Management: MuConvert Spotify Music Converter takes care of the details, retaining all essential ID3 tags and metadata information, including title, artists, track ID, and album artwork, for each Spotify song. No need to manually edit or manage your tracks; everything stays organized and accessible.
- Multiple Output Formats: Spotify Music Converter offers multiple output formats, including MP3, M4A (AAC), WAV, FLAC, AIFF, and M4A (ALAC). These formats ensure seamless compatibility with a wide range of players and devices, allowing you to save your favorite music files permanently and enjoy offline playback wherever you go.
- Customizable High-Quality Downloads: MuConvert Spotify Music Converter lets you choose your preferred output quality, ranging from 128 Kbps to a crystal-clear 320 Kbps. Additionally, you have the freedom to edit bit rates, sample rates, and more, providing the perfect audio setting that suits your needs.
Step 1. Install and Run MuConvert Spotify Music Converter
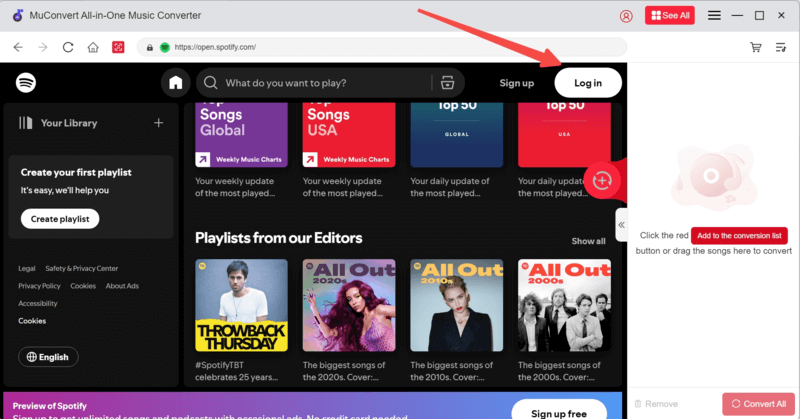
Please click the Download button to obtain MuConvert Spotify Music Converter. Once the installation is complete, you can launch it and access its web player, simply click the “Login” button to sign in to your Spotify account. The software enables you to download music from Spotify for free, so you can easily log in using your Spotify free account credentials.
Step 2. Add Tracks, Albums, or Playlists to Download
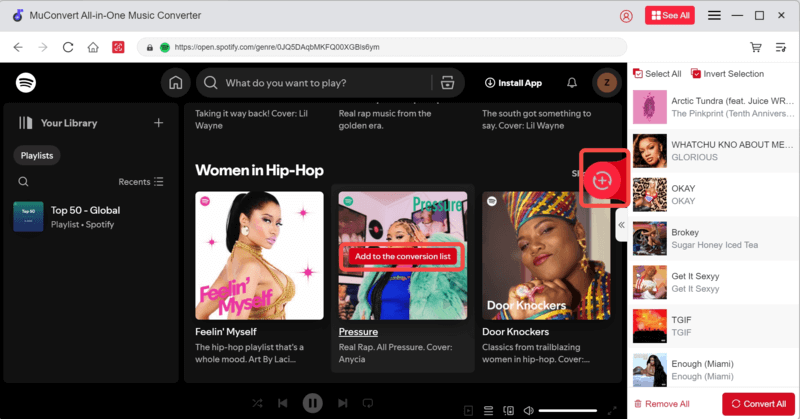
Following the previous steps, you can add songs from Spotify by clicking the green “+” button on the main interface of the music converter. Subsequently, a smaller window will appear, allowing you to simply drag & drop a song, album, or playlist from Spotify directly into the adding window.
Step 3. Choose Preferred Output Formats & Parameters
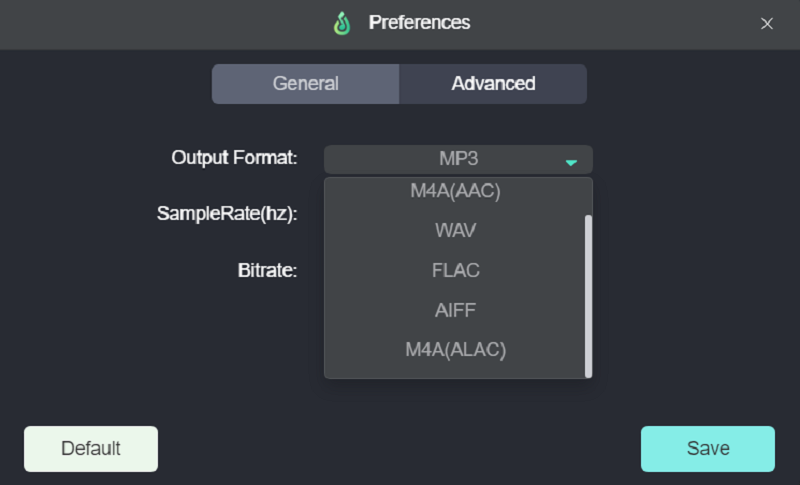
To set the desired file format, access the “Preferences” > “Advanced” section. Here, you can select from a range of music file formats, including MP3, M4A, FLAC, WAV, AIFF, AAC, and ALAC. You also have the option to customize the bitrate, sample rate, and other relevant parameters.
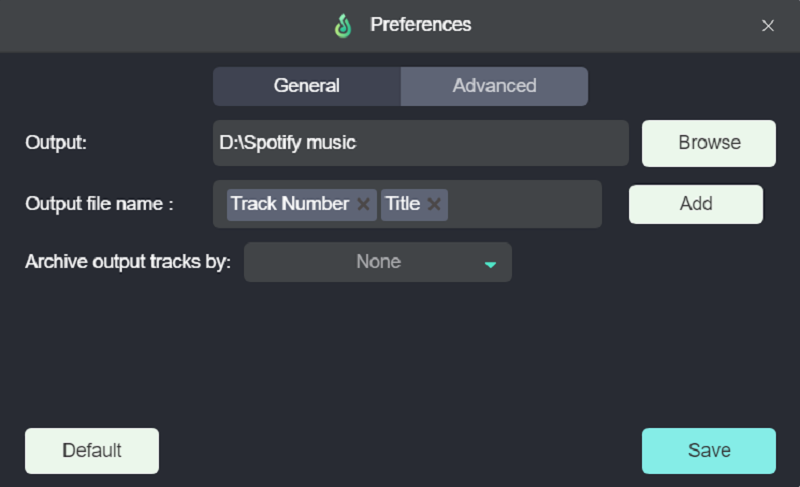
For the File Folder location, click on “Options” > “General.” You’ll be able to specify your personal file folder where the downloaded music will be stored. If you prefer to keep it as the default location, you can leave it unchanged.
Step 4. Download Songs on Spotify for Free
Lastly, just click the “Convert All” button to initiate the free download of Spotify songs instantly. Thanks to the impressive 35X faster speed and the convenient batch download feature, the downloading process will be completed in no time, allowing you to enjoy your favorite tracks hassle-free.
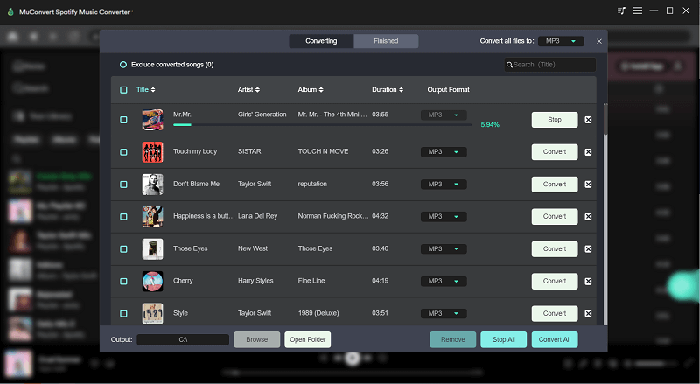
Once the conversion process is completed, you can import these downloaded songs to Spotify and then enjoy your favorite tunes in Ads-Free mode.
Block Spotify Ads with Chrome Extension
If you prefer Spotify Web Player, it is recommended to block ads with some Google Chrome extensions such as uBlock Origin, Adblock, and EZBlocker. Well-received by Spotify Web Player users, they can function seamlessly with open.spotify.com, removing Spotify ads from loading and seamlessly muting them, without affecting other audio on your device. Here, this part will focus on the usage of uBlock Origin and give you a full guide.
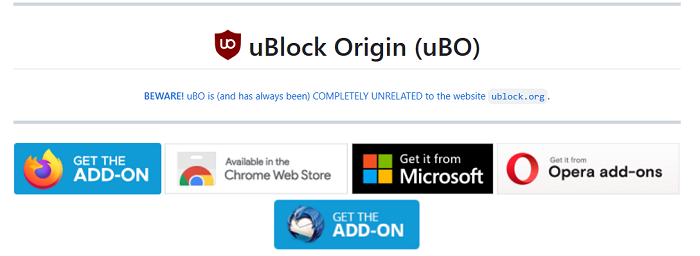
Step 1: Open the Chrome Web Store and search for “uBlock Origin.” Click on the “Add to Chrome” button to install the extension.
Step 2: Launch the Spotify Web Player in a new tab. Then look for and click the icon of uBlock located on the Chrome address bar.
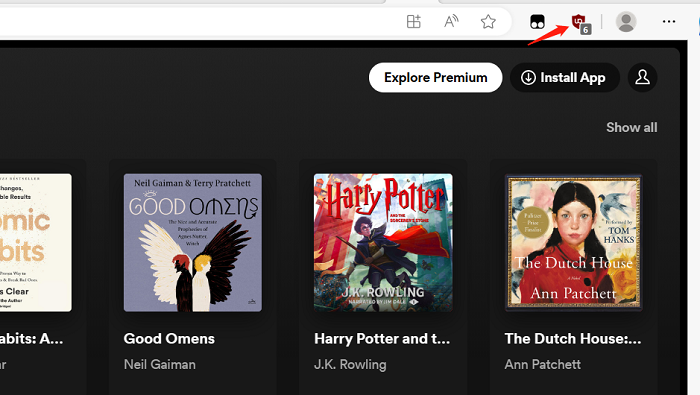
Step 3: Click on the gear icon on the right side of the top-up window to open the uBlock Origin dashboard.
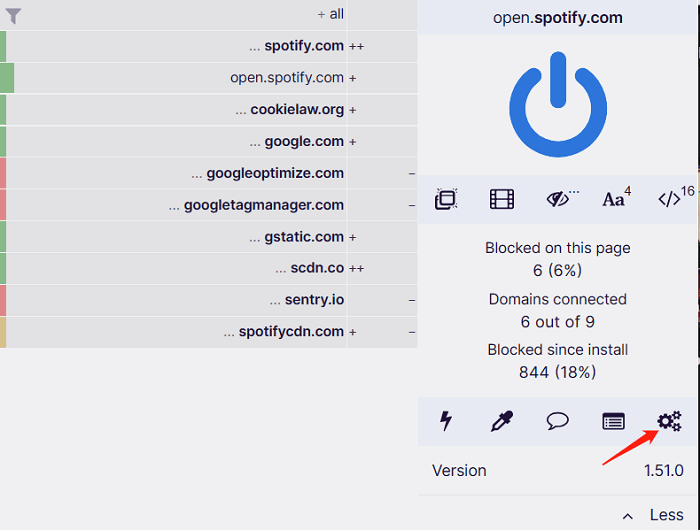
Step 4: Then navigate to the “My Filters” tab.

Step 5: Add the following filters to block Spotify ads and hit “Apply changes” to save the filters:
- bashCopy code
- ! Block Spotify ads
- ||audio-fa.scdn.co/ads/
- ||||imasdk.googleapis.com/js/sdkloader/ima3.js
- ||pagead2.googlesyndication.com/pagead/js/adsbygoogle.js
- ||www.googletagservices.com/tag/js/gpt.js
- ||www.googletagmanager.com/gtm.js
- ||www.google-analytics.com/analytics.js
- spotify.com###header-ad-container
- spotify.com###leaderboard-ad
- spotify.com##.ad-container
uBlock Origin may not be effective in all cases, because Spotify will frequently update its ad delivery methods, which could result in uBlock Origin being unable to block all ads consistently. Thus, MuConvert Spotify Music Converter may be a good way, since you can download Spotify songs for free and listen to them offline, getting rid of Spotify ads.
Part 2. How to Block Ads on Spotify on iOS/Android
If you would like to listen to Spotify on the mobile app, there are also two different tools that provide you with an ad-free music experience. Now, let’s dive into these two possible ways to block ads on Spotify mobile.
Remove Spotify Ads with StopAd
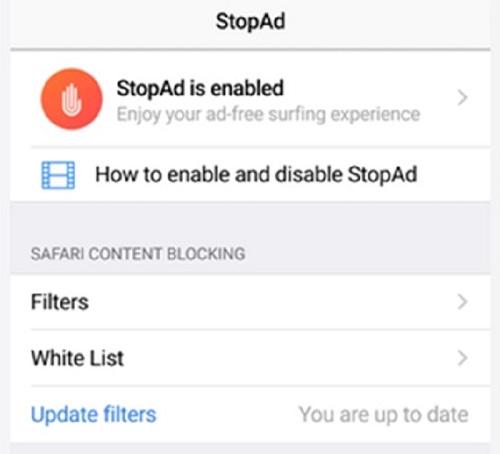
StopAd is an ad-blocking software designed to prevent intrusive and annoying advertisements from appearing on various internet platforms. This ad blocker stands out as one of the top choices for iOS, Android, Windows, and Mac users. Utilizing this efficient tool, you can easily block ads on Spotify at no cost.
Step 1: Download and install StopAd from the official website on your iPhone and launch it.

Step 2: Locate the Settings option within StopAd and tap on it. Under Settings, choose “Applications” and then select “Search app.” Look for Spotify in the list and click on it.
Step 3: Once Spotify is displayed, select the checkbox next to it to enable filtering for the app.
Step 4: Click on “Add to filtering” to confirm the ad-blocking setup for Spotify.
Get Rid of Spotify Ads with Mutify
Mutify stands out as an exceptional Spotify ad-silencing app, providing you with a seamless ad-free listening experience. Completely free and working in the background, Mutify automatically detects when Spotify plays an ad and promptly reduces the music volume to zero. Thus, you can relish your favorite music without being interrupted by those bothersome and loud Spotify ads.
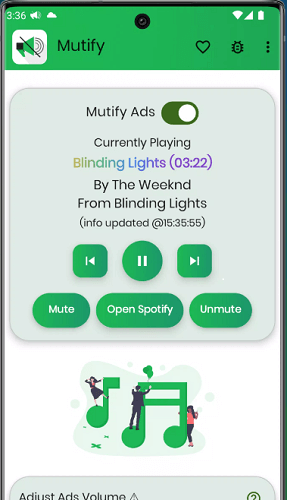
Step 1: Install Mutify from the Google Play Store and open the Spotify app on your device.
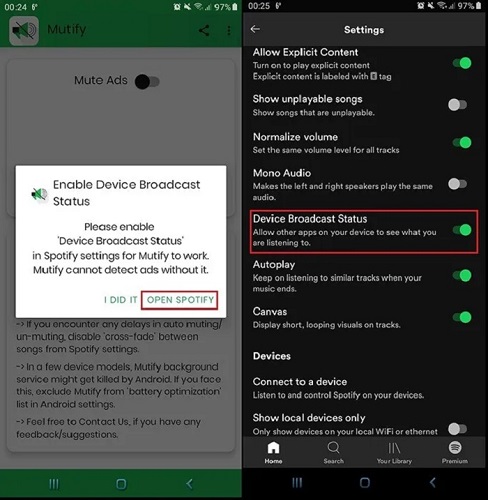
Step 2: Access the Settings menu and find the “Device Broadcast Status feature”. Toggle the slider next to it to enable this option.
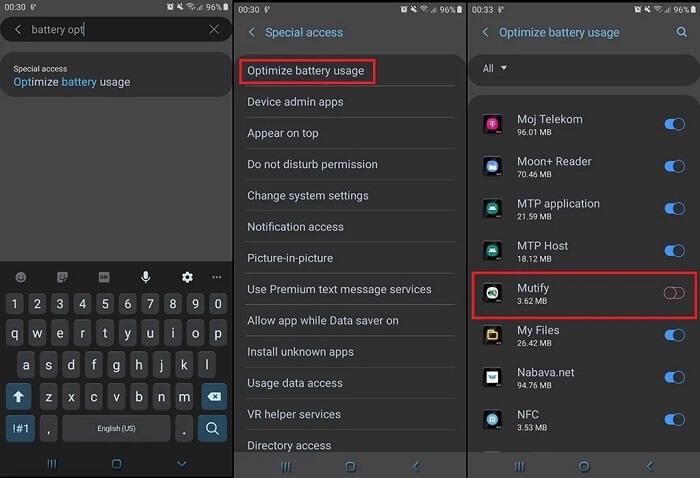
Step 3: Close the Spotify app and go to your phone’s Settings. Search for “Battery Optimization” and tap on it. In the Battery Optimization menu, select “Not optimized,” and then tap on “All Apps.” From the list of apps, find and tap on “Mutify.” Then Choose “Don’t optimize” to disable battery optimizations specifically for Mutify.
Step 4: Reopen Mutify and tap on the “I have enabled it” option to activate the Device Broadcast Status. Toggle the slider next to “Mute Ads” in Mutify. With this setting in place, Mutify will instantly mute Spotify ads when they play.
Before using Mutify, you must enable the “Device Broadcast Status” in the Spotify settings to make Mutify work properly. If you are an iOS user, you also need to disable the power-saving mode to ensure that it works uninterrupted in the background. What’s more, Mutify simply mutes the ads instead of removing them entirely.
Bonus Tip: Upgrade Free Account to Premium to Block Spotify Ads
If you are a dedicated Spotify user and prefer a premium experience without switching to third-party methods or tools, directly renewing your Spotify Premium subscription is the simplest option. Also, there are various ways to get a free trial of Spotify Premium. With Spotify Premium, you can enjoy ad-free listening, offline downloads, and high-quality audio, among other additional features.
Here are the steps for subscribing to premium.
Step 1. Go to Spotify Premium Official Page.
This will open the Spotify Premium page. Make sure you log in to the correct account if you already have one set up.
- If you don’t have an account, you can sign up for a free account first.
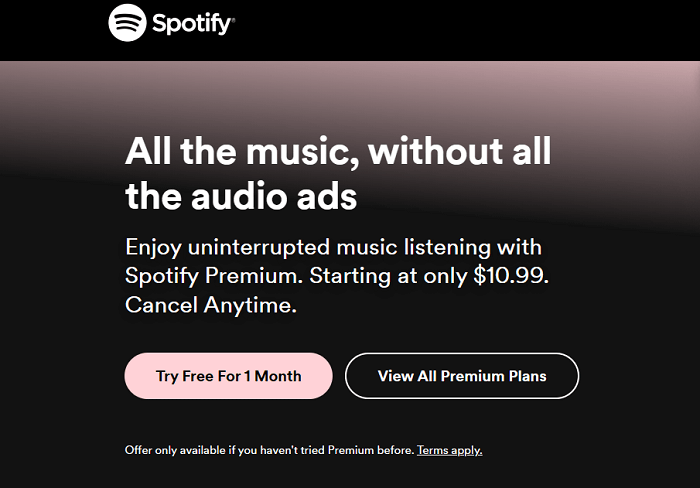
Step 2. Click the “Try Free For 1 Month” button located at the top of the page for your 1-month free trial. Please note that if you have previously utilized the free trial, you won’t be able to register for another one. However, you can explore the different Premium plans and upgrade your account by clicking on “VIEW All Premium Plans” to access the plan details.
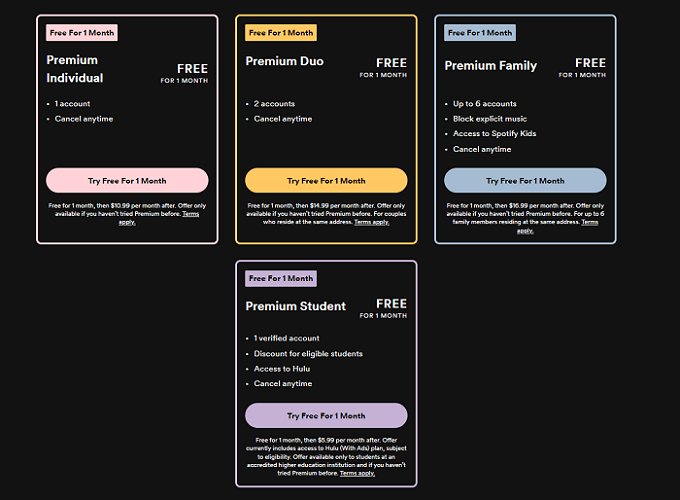
Step 3. Choose a Premium plan: There are 4 types of Spotify Premium plans, such as individual, family, and student plans. Select the plan that suits your needs the best.
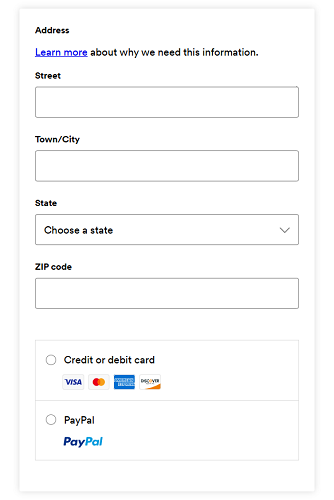
Step 4. Choose your preferred payment method: From the dropdown list, select how you’d like to pay. Payment options may vary depending on your region, but in most cases, you can use a debit card, credit card, or PayPal.
Step 5. After all steps has been done, just hit “Buy Now”.
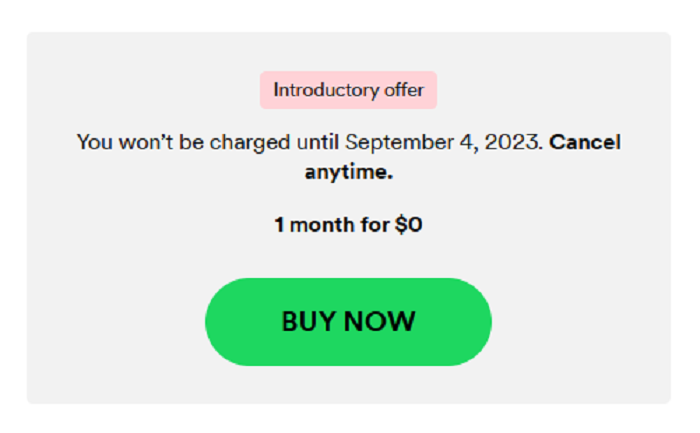
Step 6. If you qualify for the 2-month free trial, it will commence immediately. However, if not eligible, you will be billed, and your account will be upgraded to the Premium subscription.
Once you are on the Premium plan, recurring charges will be made every 30 days until you decide to cancel your subscription.
Conclusion
The tools provided in this post are all workable for you to block ads on Spotify without premium. Comparing these tools, if you are a Spotify user on mobile, StopAd will be your top choice. If you are into enjoying beautiful tunes on the computer, MuConvert Spotify Music Converter can be your ideal partner as it will spare you from a premium subscription and provide you with a smooth and unstoppable music world.
Convert Spotify Music to MP3 in 320kbps
Drag and drop to convert Spotify songs, albums, playlists, and podcasts to MP3 easily.
