


How to Register MuConvert SoundCloud Music Converter
To unlock the full features of MuConvert SoundCloud Music Converter, you need to activate the software using a valid license key. Follow the steps below to complete the registration process.
Step 1. Install MuConvert SoundCloud Music Converter
Click the buttons below to download and install the latest version of MuConvert SoundCloud Music Converter on your computer.
Step 2. Purchase the Register License
Head to the MuConvert Online Store tto select a registered plan from 1-month, 1-year, and lifetime. When the payment is completed successfully, you can receive a confirmation email with the license code attached (please make sure you have entered the correct email address when inputting your information).
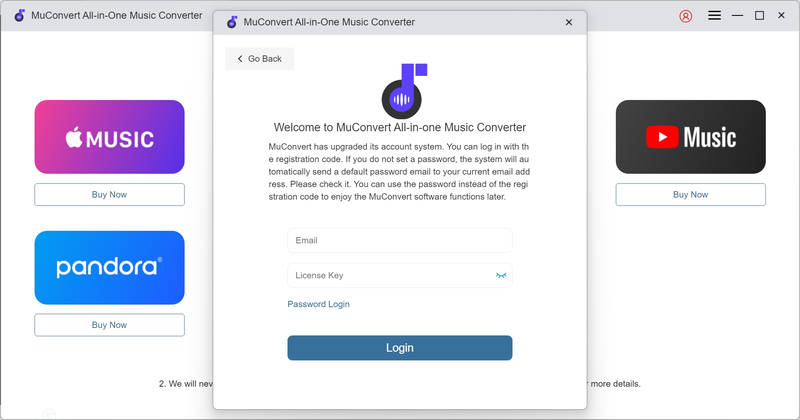
Step 3. Activate MuConvert SoundCloud Music Converter
Launch the MuConvert SoundCloud Music Converter and the registration window will pop up. Simply enter your email address (the one you used for purchasing) and the license code, hit the “Activate” icon, and successfully activate the registered version.
Note: If the registration window fails to pop up, access it by hitting the “Unactivated” icon on the top right of the software window.
How to Convert SoundCloud Music/Playlist to MP3/M4A/FLAC/WAV/AIFF/ALAC
With MuConvert SoundCloud Music Converter, you can effortlessly download your favorite tracks from SoundCloud in popular formats such as MP3, WAV, or FLAC. This guide will walk you through the simple steps to get started and enjoy your music offline.
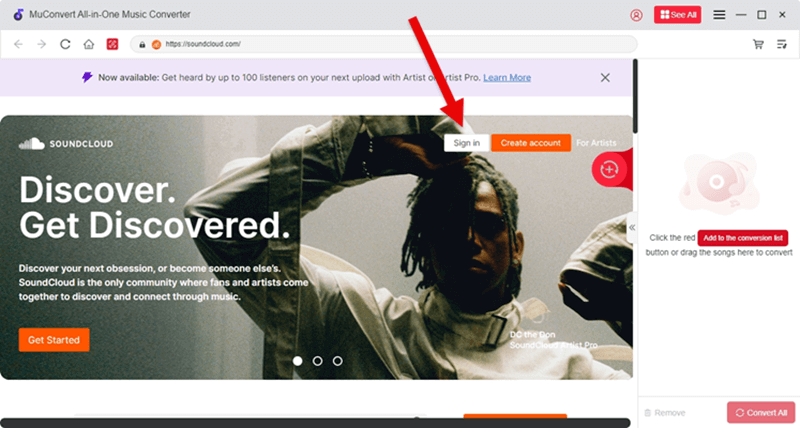
Step 1. Access SoundCloud Music Web Player in MuConvert
Open MuConvert SoundCloud Music Converter on your computer. When the interface loads, click the “Sign in” button located in the top-right corner to log into your SoundCloud account.
- Free accounts can also sign in to convert SoundCloud music
- MuConvert SoundCloud Music Converter will only read and sync the music data to your account. It will not collect your private account information.
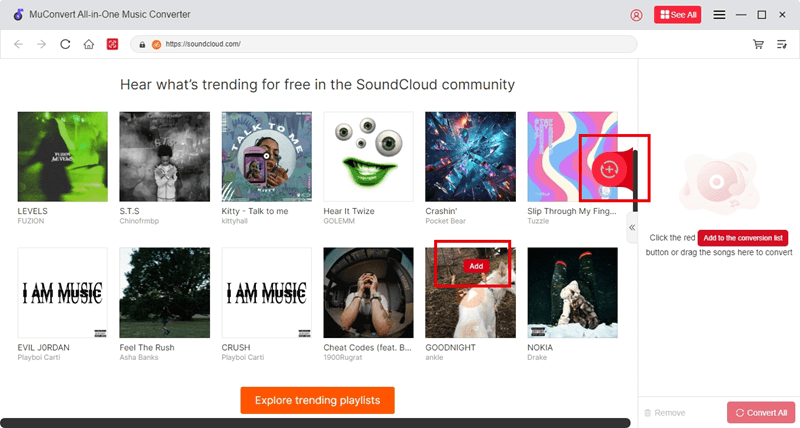
Step 2. Select SoundCloud Music or Playlist to Convert
Navigate through the SoundCloud web player inside the software to discover the songs or playlists you’d like to download. Simply drag and drop individual tracks or whole playlists into the “+” area. After adding them, MuConvert will automatically get them ready for conversion.
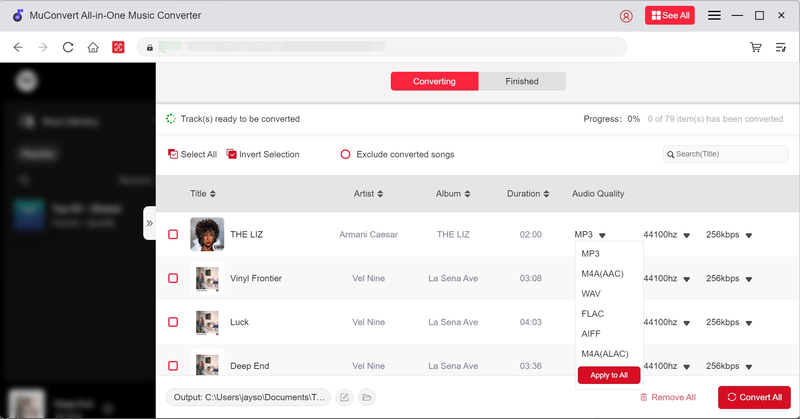
Step 3. Set up the Output Format
In the Audio Quality section, open the drop-down menu to choose the output format you want, whether it’s MP3, WAV, FLAC, or another supported format. Additionally, you have the option to adjust both the quality and sample rate to meet your specific preferences.
Step 4. Start Downloading Selected Songs
Once you’ve configured all your settings, click the “Convert All” button to begin converting your Spotify songs. Thanks to batch downloading and hardware acceleration, the process will be quick and efficient.
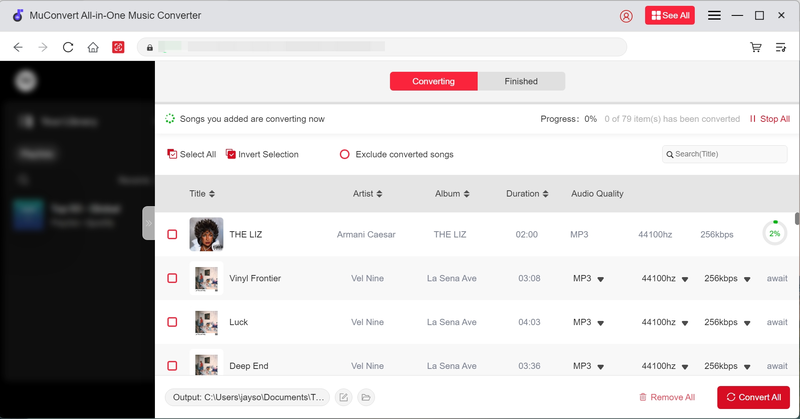
Additionally, if you decide to cancel the process, you can stop the conversion for any song at any time. However, keep in mind that if you resume the conversion, the download will restart from the beginning.
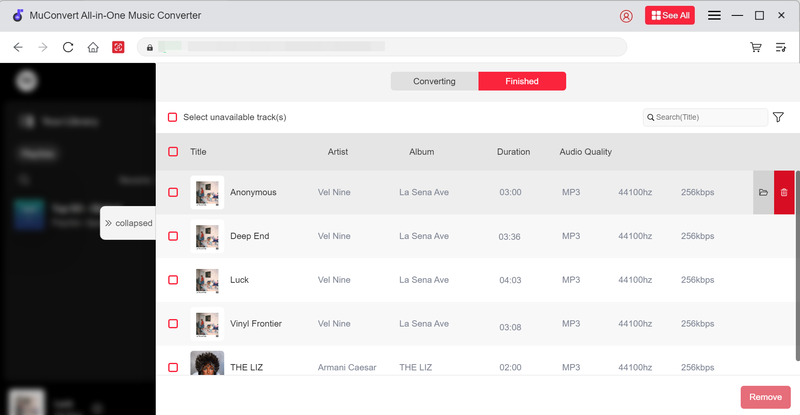
Step 5. Access the Converted SoundCloud Music
After the conversion is finished, go to the “Finished” tab and click on the file icon to access your converted tracks in formats such as MP3, M4A, FLAC, WAV, AIFF, or ALAC.
How to Customize Output Folder and Parameters
In MuConvert SoundCloud Music Converter, bitrate and sample rate, as well as output path, can be customized. Here is how it works.
Change Output Folder
By default, MuConvert SoundCloud Music Converter saves your converted SoundCloud tracks to a folder automatically created by the software. However, you have the flexibility to change the output folder for easier file management. There are two methods to do so:
- Method 1: After adding music and completing the parsing, you can choose the output folder by browsing at the bottom of the conversion window to specify where the converted SoundCloud songs should be saved.
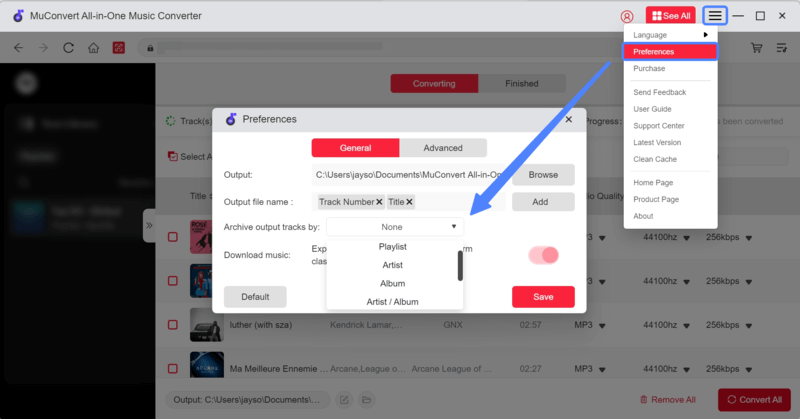
- Method 2: Alternatively, click on the “Burger” menu in the top-right corner of the main interface, then navigate to “Preferences.” Under the “General” tab, you can select a new output folder for your converted songs.
Customize Output Parameters
Adjusting the bitrate and sample rate is simple and works similarly to changing the output folder. Here’s how to do it:
Step 1. Go to the “Burger” menu and select “Preferences.”
Step 2. In the “Preferences” window, choose “Advanced” where you’ll find options to adjust both the “Bitrate” and “Sample Rate.”
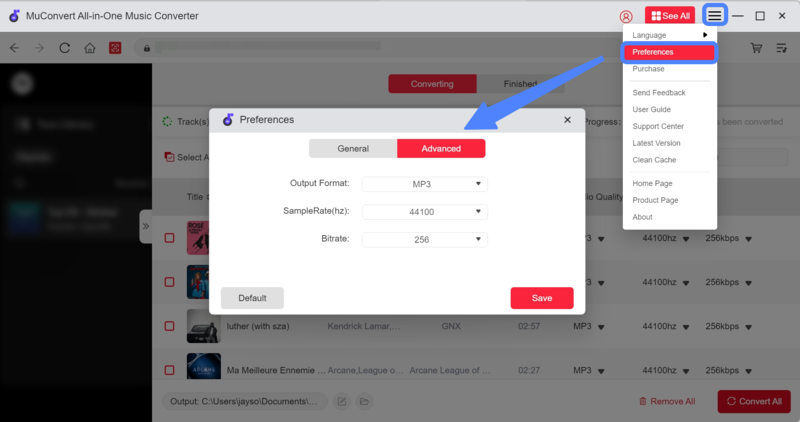
By default, MuConvert SoundCloud Music Converter uses a bitrate of 256 kbps and a sample rate of 44.1 kHz, which provides great sound quality for most users. However, for those seeking even higher quality, you can choose lossless options, such as a bitrate of 320 kbps and a sample rate of 44.8 kHz, ensuring your output tracks sound as clear and crisp as possible.
How to Change Language and Manage History in MuConvert
If you’re looking to adjust the display language or manage your download history in MuConvert SoundCloud Music Converter, here’s how to do it.
Change the Software Language
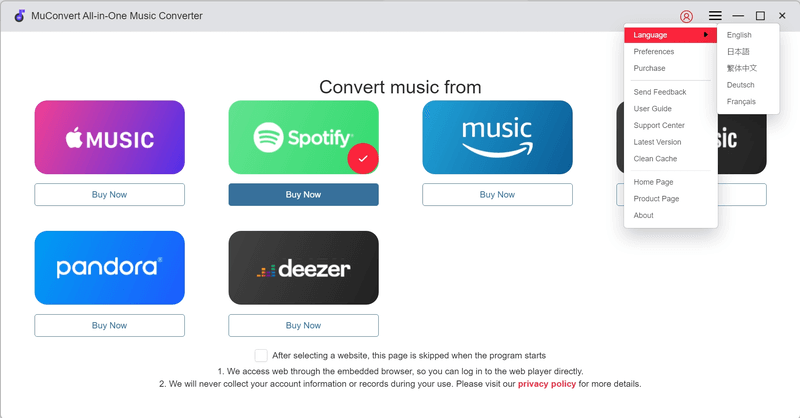
While MuConvert SoundCloud Music Converter uses the SoundCloud web player for its main interface, the language display can still be changed. You can choose from languages like English, French, German, Japanese, and Chinese.
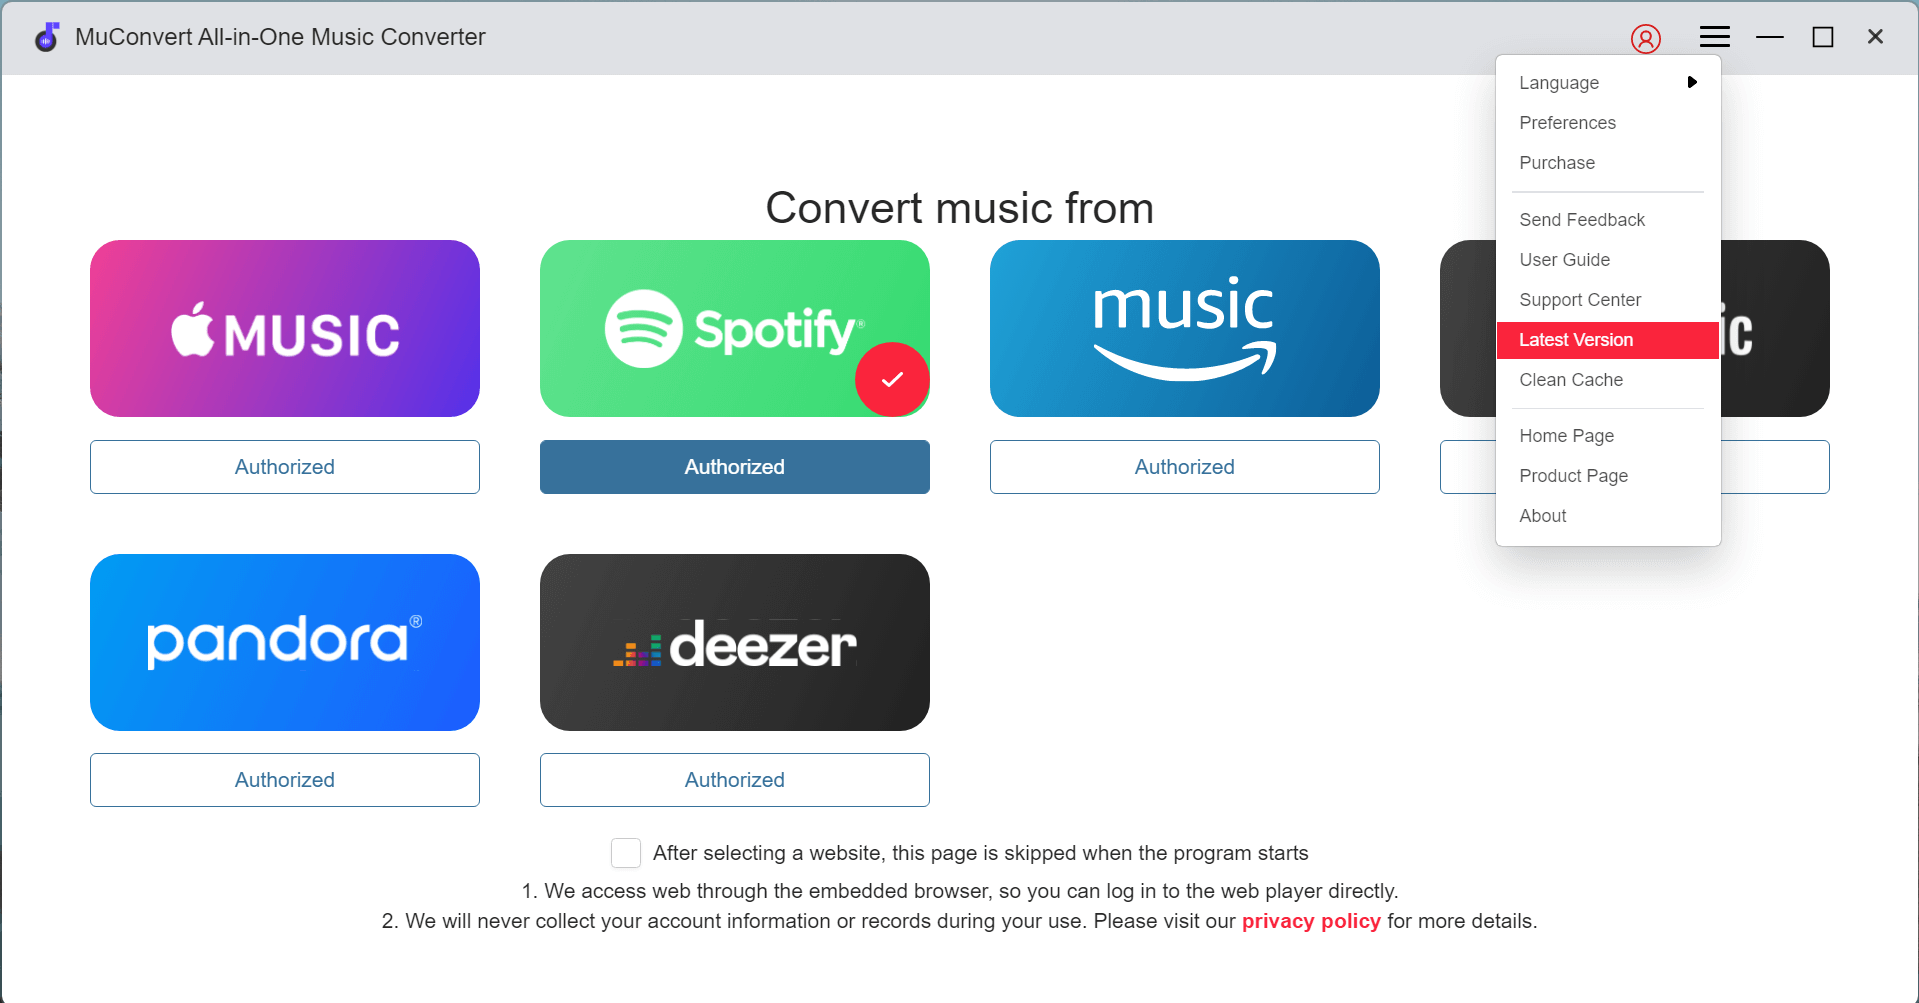
To change the language, go to the “Burger Menu“, select “Language“, and then choose your preferred language for the software. This will make it easier to navigate and eliminate any language barriers.
Manage Conversion History
MuConvert SoundCloud Music Converter keeps a log of all your completed conversions, allowing easy access to your converted tracks. To manage this history, click the icon next to the “Burger Menu” to open the conversion window.
In the “Converting” tab, you can monitor any ongoing conversions of SoundCloud tracks.
Once the conversion is finished, head to the “Finished” tab, where you’ll find a list of all your converted songs. You can easily find the folder where your converted files are saved by clicking on “View Output File.” If you wish to clear all conversion history, simply select the checkbox and hit “Delete.”
Note: The “Clear Cache” option in the “Burger Menu” only removes account information and does not delete any of your conversion records.
How to Update/Uninstall MuConvert SoundCloud Music Converter
MuConvert SoundCloud Music Converter offers an intuitive setup process that’s easy to follow. Here’s a simple guide to help you with updates and uninstallation.
Update MuConvert SoundCloud Music Converter
Whenever a new version of MuConvert SoundCloud Music Converter is available, you’ll get a notification when you open the software. Just follow the prompt to update, and it will automatically install the latest version.
If you prefer to manually check for updates, navigate to the “Burger Menu” and click on “Check Update“. This will allow the software to check for any available updates. If a new version is detected, just follow the on-screen instructions to update the software.
Uninstall MuConvert SoundCloud Music Converter
Uninstall MuConvert SoundCloud Music Converter differs slightly between Windows and macOS. Here’s how to remove it:
For Windows:
Go to your desktop and locate the software icon. Right-click on it and choose “Uninstall.” MuConvert SoundCloud Music Converter will guide you through the process to ensure a clean removal.
For macOS:
Find the MuConvert SoundCloud Music Converter icon in your Launcher. Press and hold the icon until you see an “X” appear. Click the “X” to easily uninstall the software.
Note: If you wish to reinstall MuConvert SoundCloud Music Converter, the easiest way is to visit the official website. The download link on the product page will always provide the most up-to-date version.